Provider Guide
Complete guide for provider administrators — from account setup and navigation to managing participants, workers, shifts, invoicing, and compliance.
On this page
1. Getting Started
New providers register their organisation on the platform through the sign-up process.
Creating an Account
- 1Navigate to the portal URL in your web browser.
- 2Click Sign Up or Get Started.
- 3Enter your organisation details: business name, your name, email address, and a secure password.
- 4Review and accept the terms of service and privacy policy.
- 5Click Create Account.
- 6Check your email inbox for a verification email and click the confirmation link.
- 7Once verified, log in and complete your organisation's profile in Profile Settings.
Registration / Sign-Up Page
Create a new provider account — fill in your organisation and personal details.
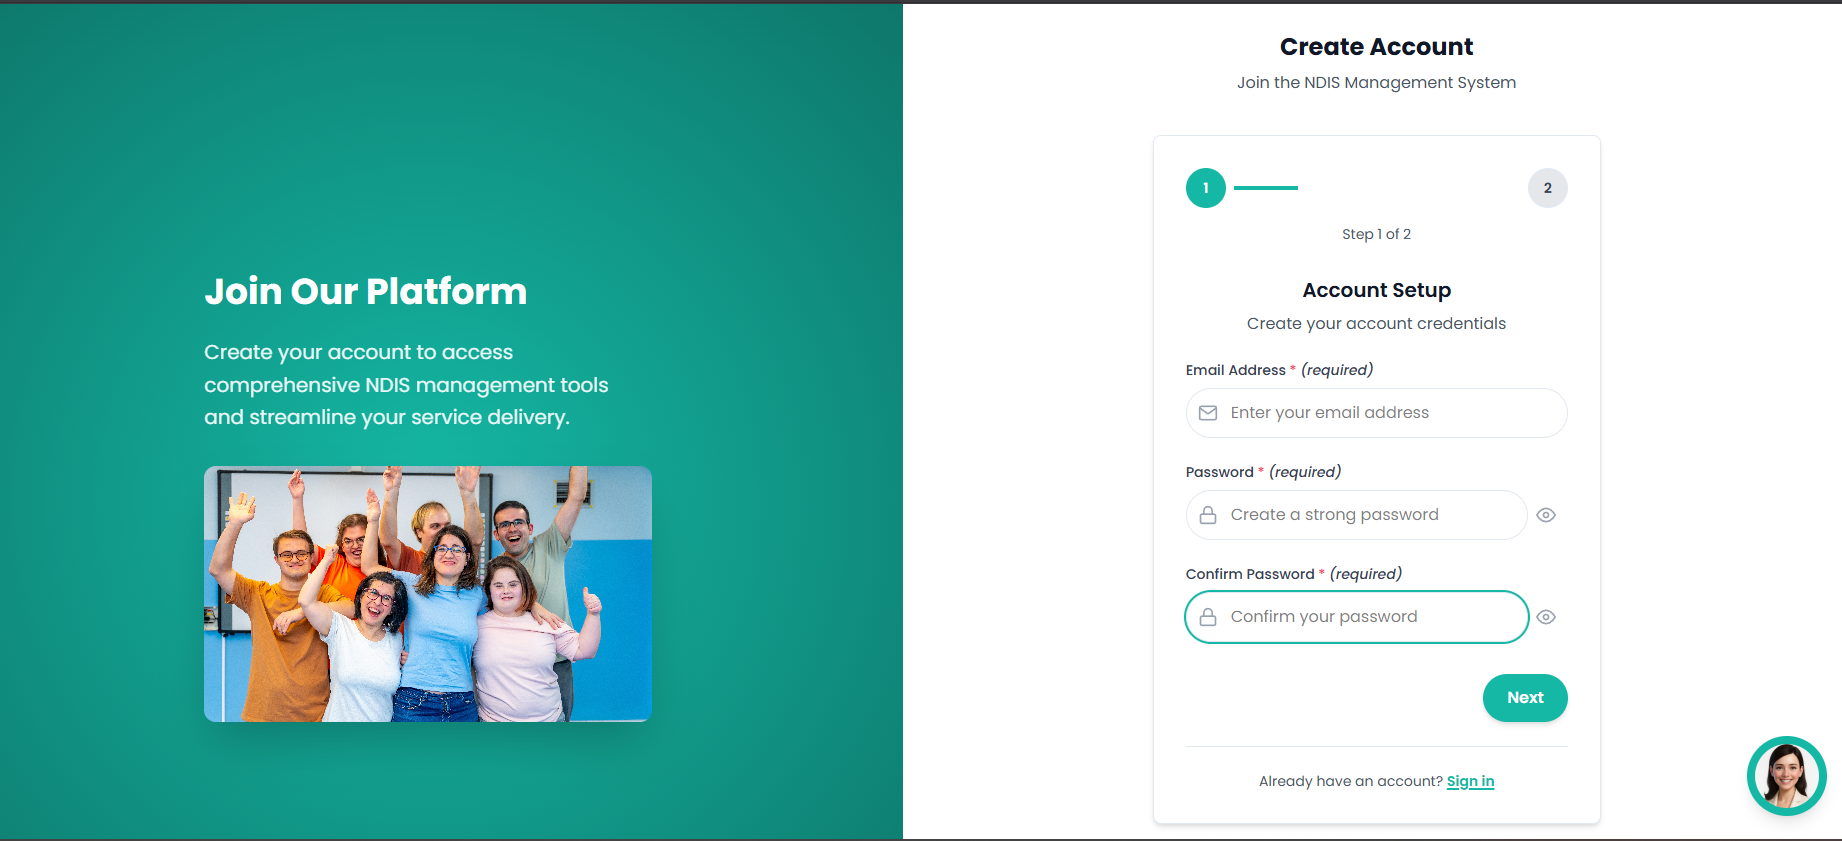
Figure 1.1 — Registration / Sign-Up Page
Logging In
- 1Navigate to the portal URL in your web browser.
- 2Click Sign In on the landing page.
- 3Enter your email and password.
- 4You will be redirected to your Provider Dashboard.
Login Screen
Sign in with your email and password to access your dashboard.

Figure 1.2 — Login Screen
2. Navigation & Settings
The provider sidebar is your primary navigation hub. All key modules are accessible from the left-hand sidebar menu.
| Menu Item | Purpose |
|---|---|
| Dashboard | Overview of key metrics and quick actions |
| Track Leads | Manage prospective participants |
| Participants | NDIS participants with plan funding |
| Clients | Non-NDIS or general clients |
| Support Workers | Manage support worker profiles |
| Practitioners | Manage practitioner profiles |
| Shifts | View and manage scheduled shifts |
| Bookings | Manage appointment bookings |
| Incidents | Record and track incident reports |
| Compliance | View compliance status across workers |
| Invoicing | Generate and manage invoices |
| Job Listings | Post and manage job listings |
Provider / Administrator Sidebar Navigation
The main sidebar is your primary navigation hub — all key modules are accessible from here.
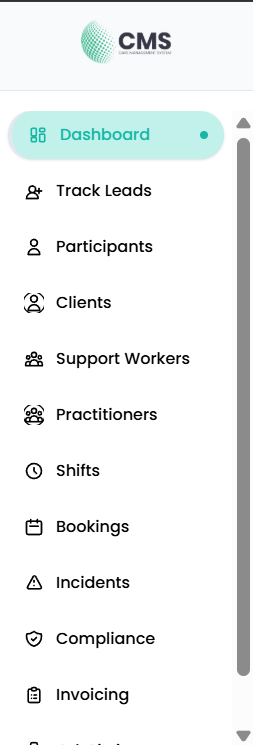
Figure 2a — Provider Sidebar Navigation
Bottom-Left Profile Menu
Click your profile button at the bottom-left of the sidebar to access organisation settings:
- Manage Users
- Profile Settings
- Account Settings
- Billing & Payment
- Sign Out
Bottom-Left Profile Button & Dropdown Menu
Click your profile button to access settings, user management, and sign out.

Figure 2b — Bottom-Left Profile Menu
3. User Management
Manage all users in your organisation — add support workers, practitioners, and administrators.
User List
View and manage all users in your organisation.
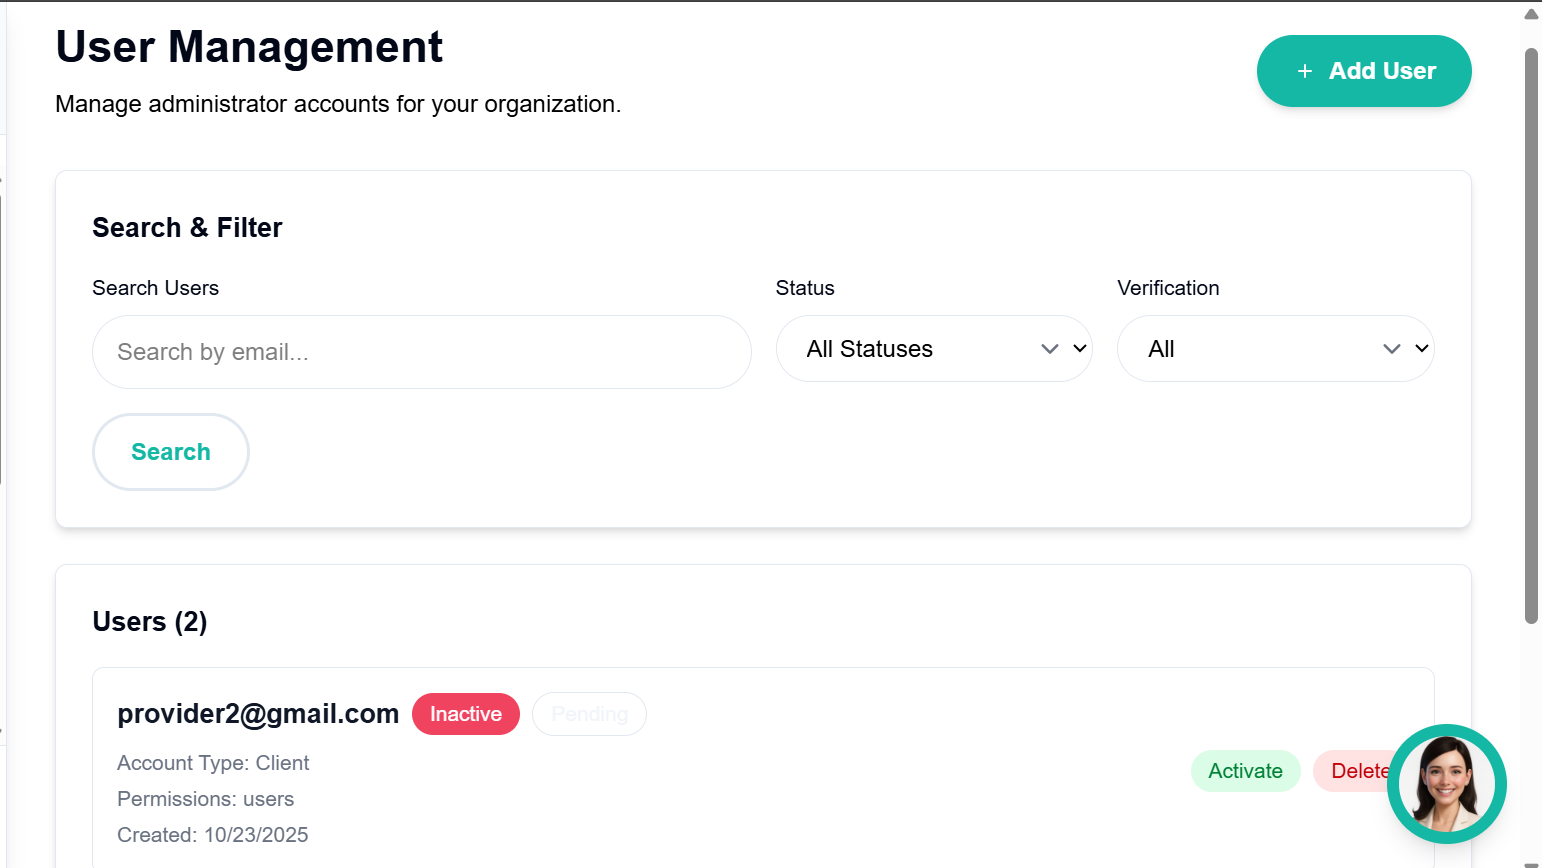
Figure 3a — User List
Add User Form
Invite a new team member by entering their details and role.
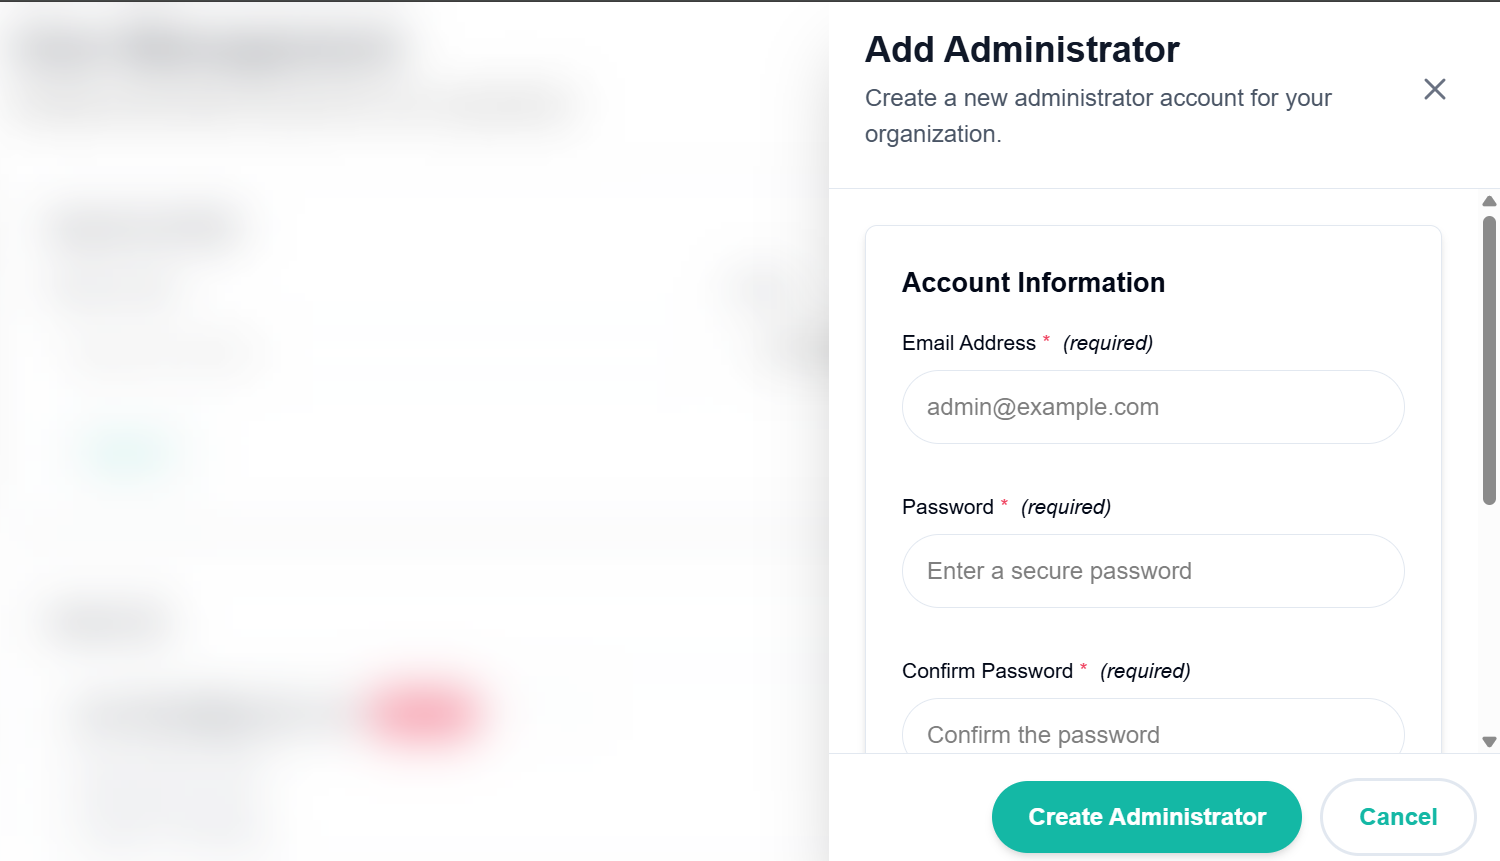
Figure 3b — Add User Form
Business Profile Settings
Update your organisation's business name, contact details, address, and logo.
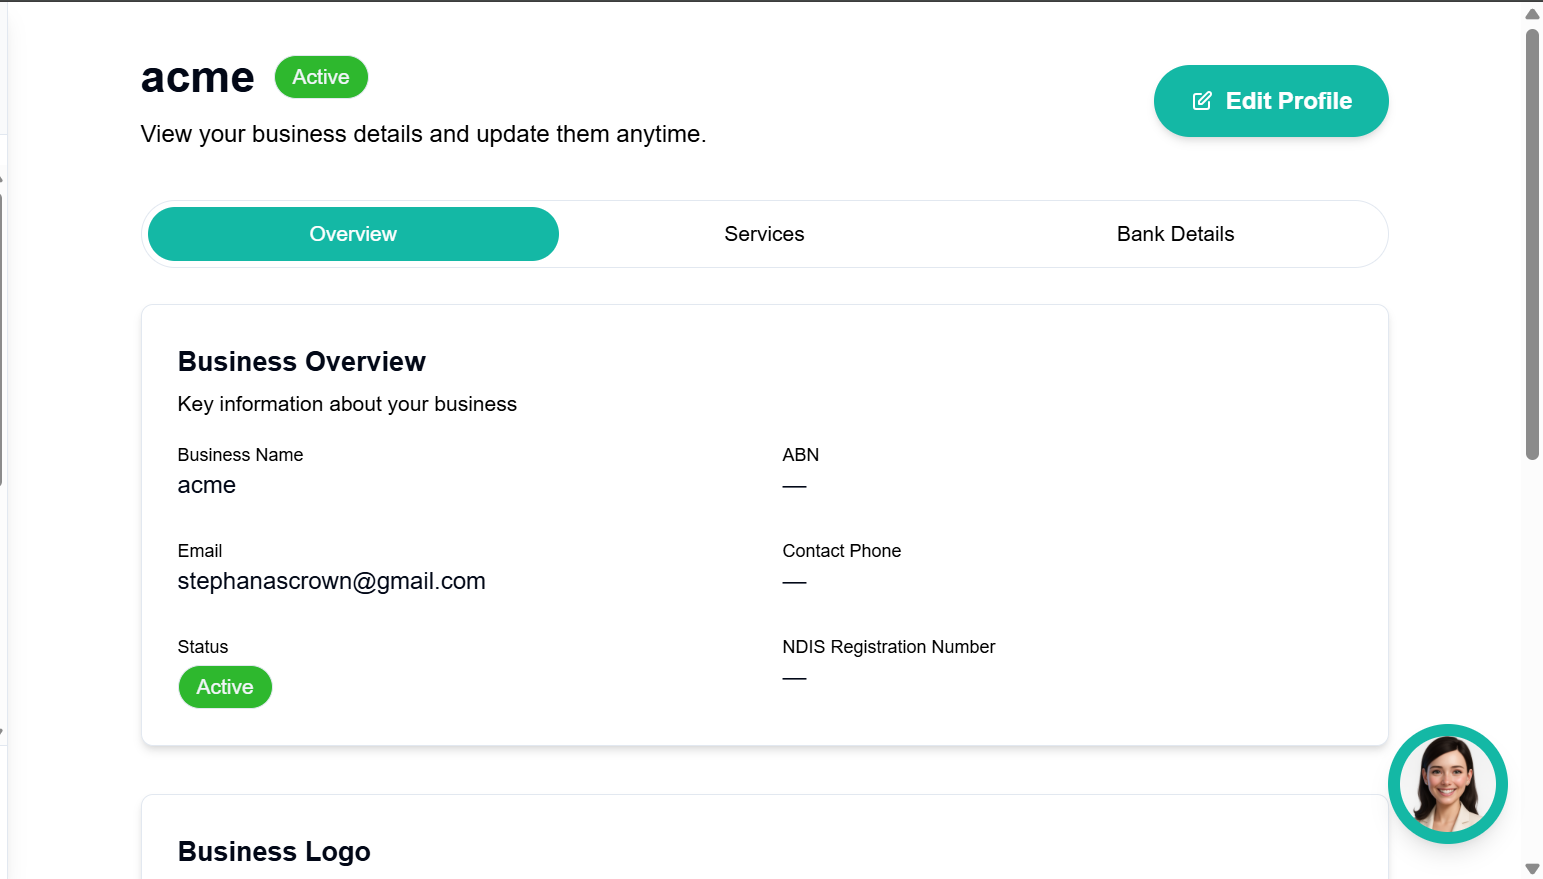
Figure 3c — Business Profile Settings
Profile Management
Manage your personal account and profile settings.
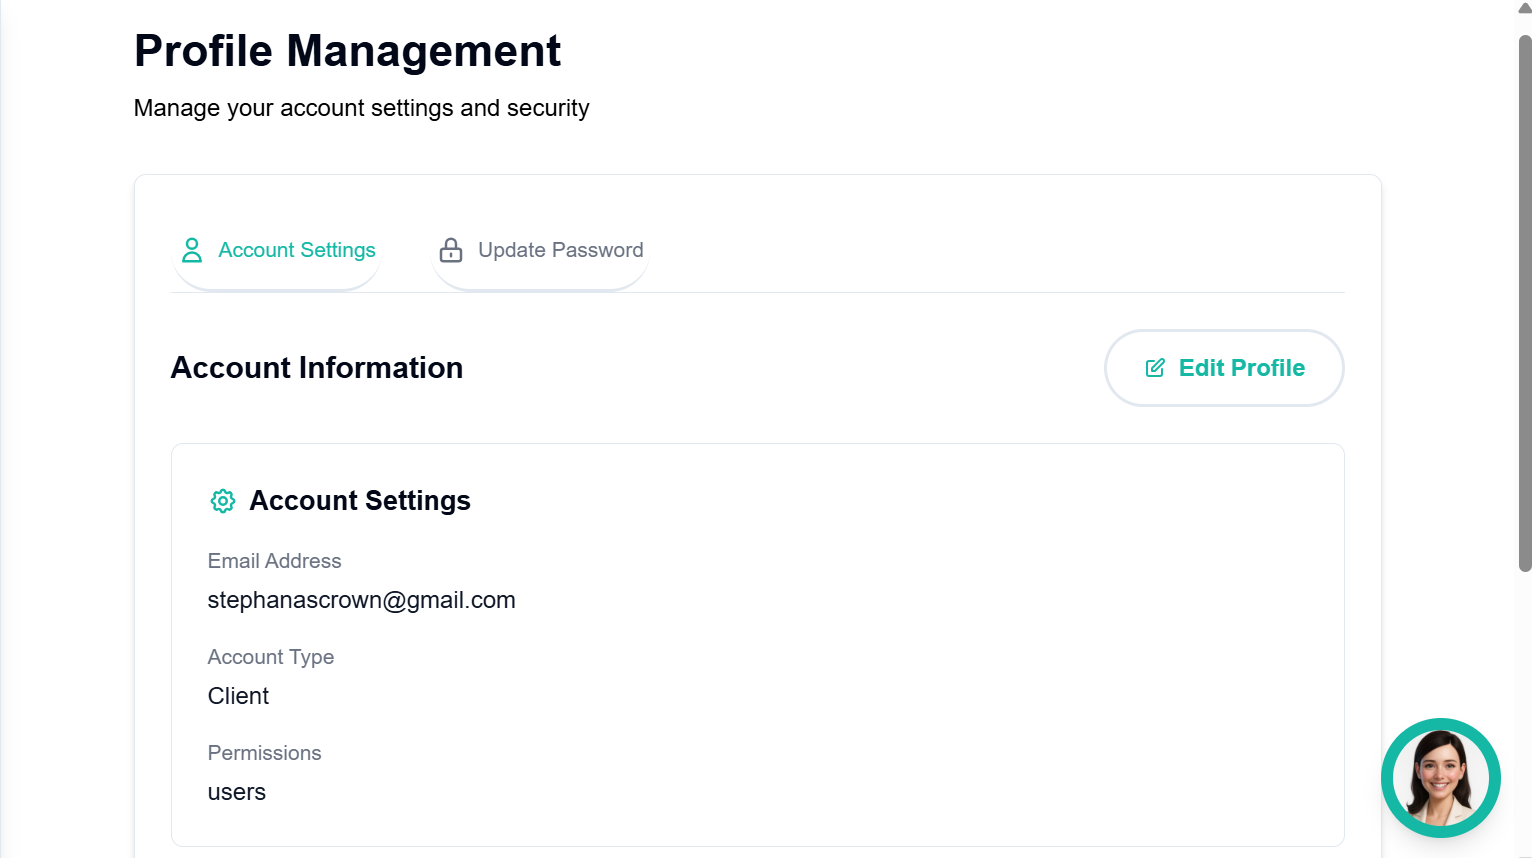
Figure 3d — Profile Management
4. Participant Management
Manage NDIS participants — create records, view profiles, and follow the end-to-end onboarding workflow.
Onboarding Workflow
Complete Onboarding Flow
- 1Create Participant Record
- 2Complete Intake Form
- 3Create Service Agreement
- 4Create Support Plan
- 5Create Schedule of Supports
- 6Complete Privacy Consent
- 7Complete Emergency Plan
- 8Complete Risk Assessment
- 9Create Requirements & Schedule Shifts
Participants List
View all NDIS participants linked to your organisation with search and type filters.
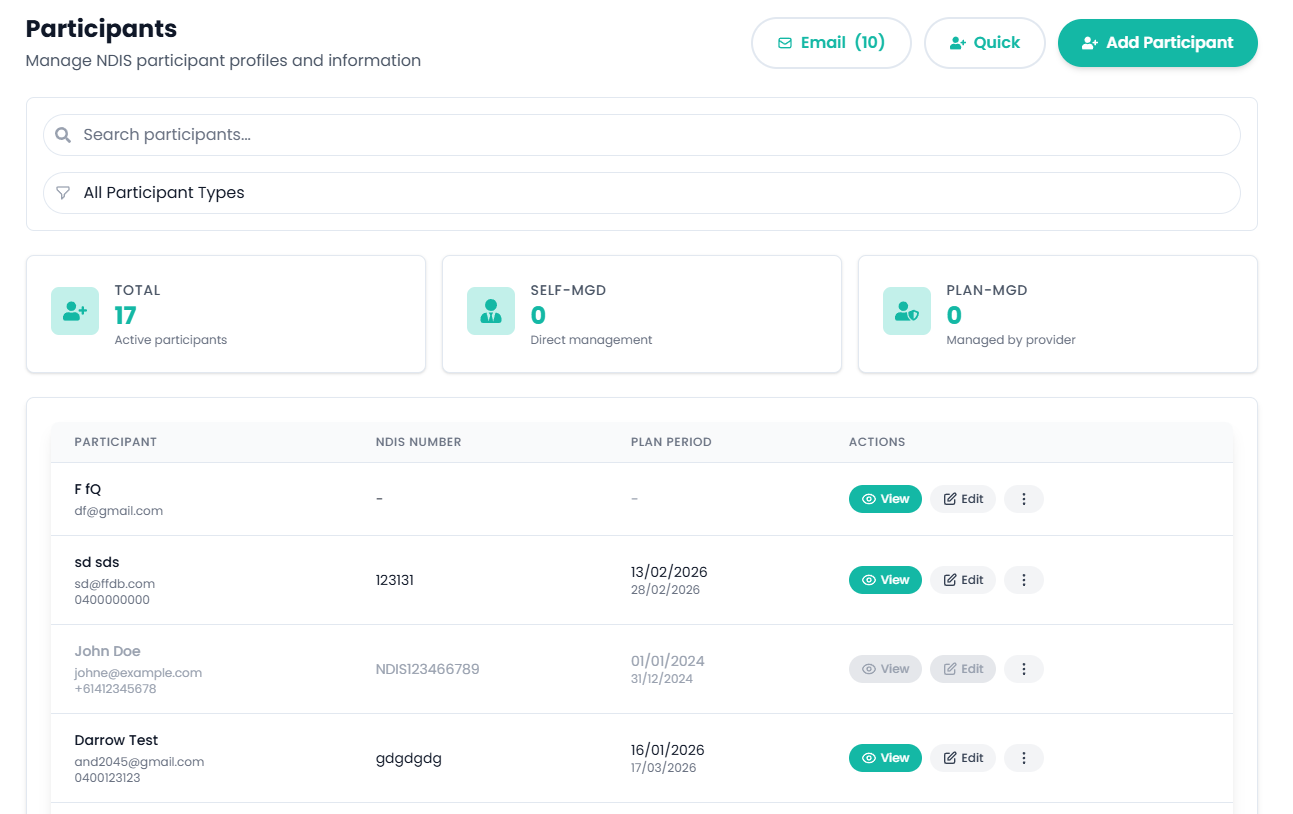
Figure 4.1 — Participants List
Add Participant Form
Register a new NDIS participant with personal, NDIS, and emergency contact details.
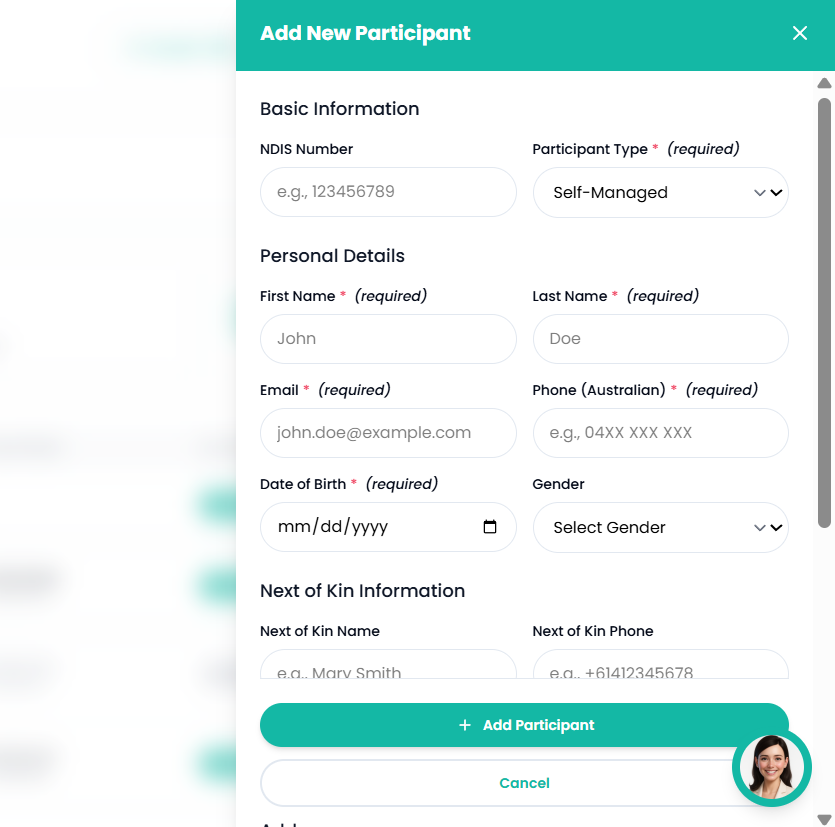
Figure 4.2 — Add Participant Form
Participant Profile Tabs
| Tab | Description |
|---|---|
| Profile | View and edit personal details |
| Participant Forms | Service Agreements, Intake Forms, Consent, Support Plans, etc. |
| NDIS Plan | Manage service requirements and scheduling preferences |
| Schedule | View the participant's shift schedule |
| Progress Notes | Session notes and goal tracking |
| Incidents | Incident reports |
| Compliance | Compliance overview and documents |
Participant Profile Tab
Central hub for viewing and editing a participant's personal and NDIS details.
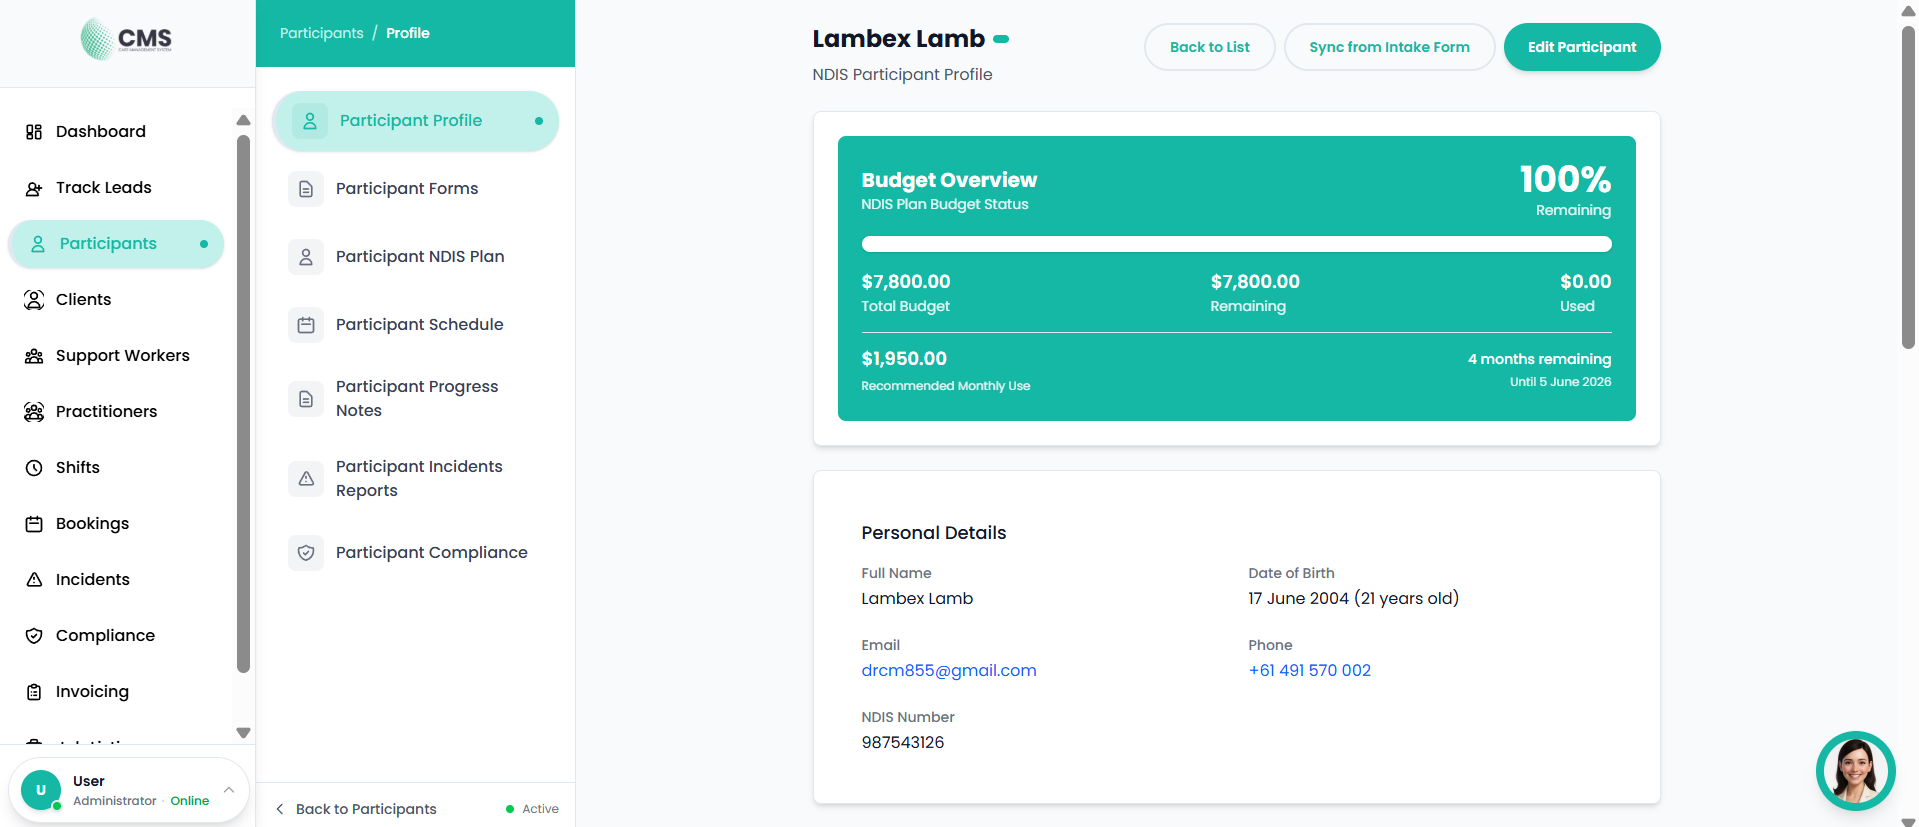
Figure 4.3 — Participant Profile Tab
Participant Forms Tab
All service agreements, intake forms, consent documents, and support plans.
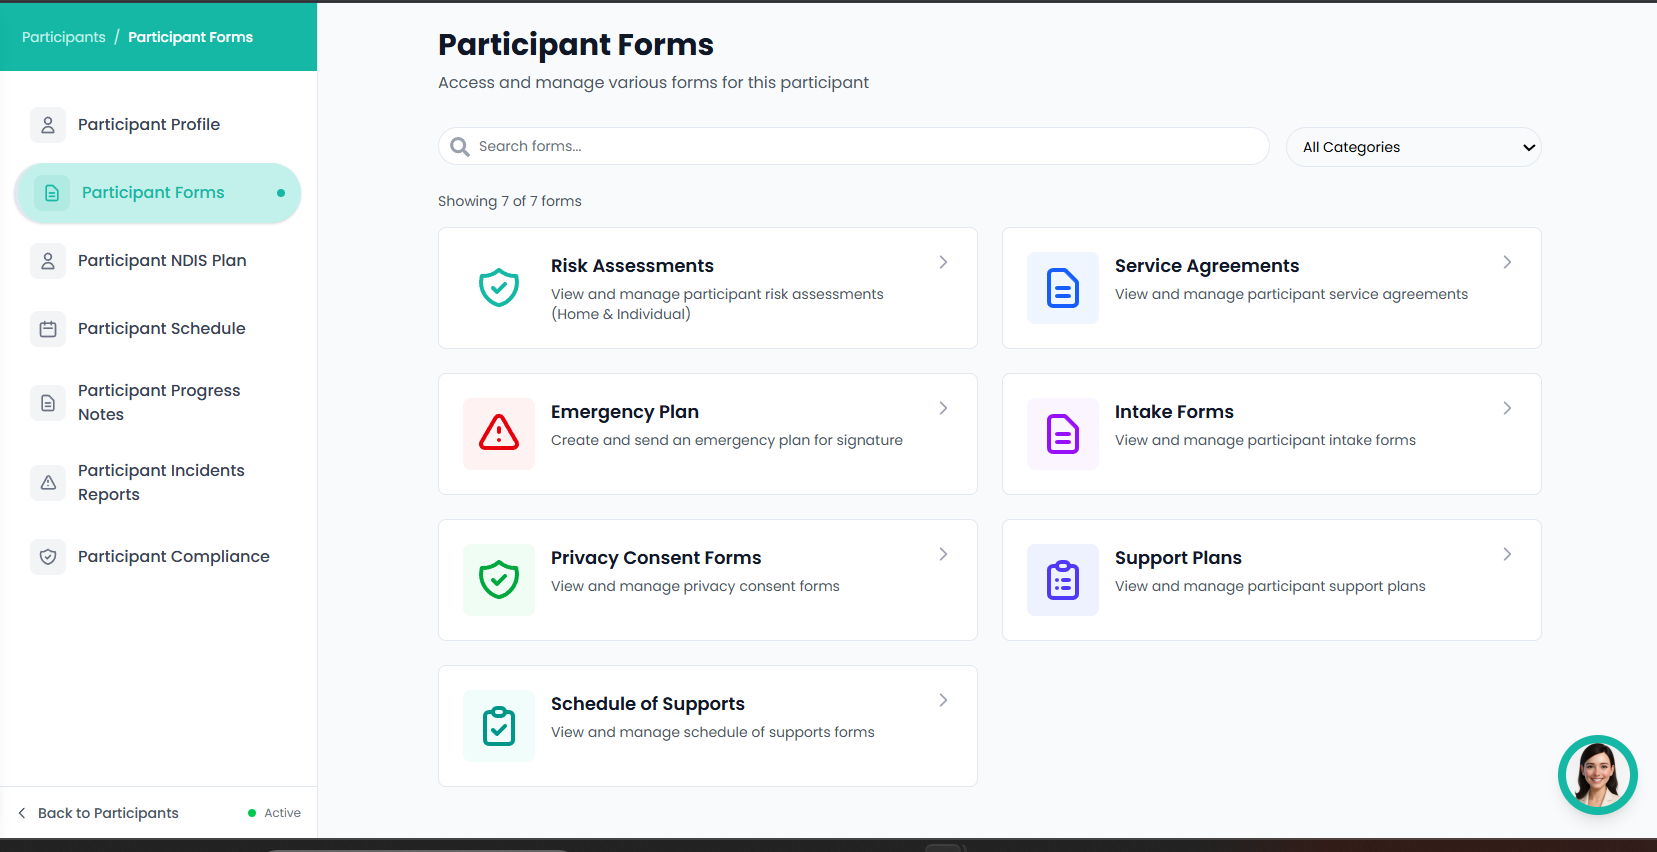
Figure 4.4 — Participant Forms Tab
NDIS Plan Tab
Plan funding details, budget tracking, and service requirements.
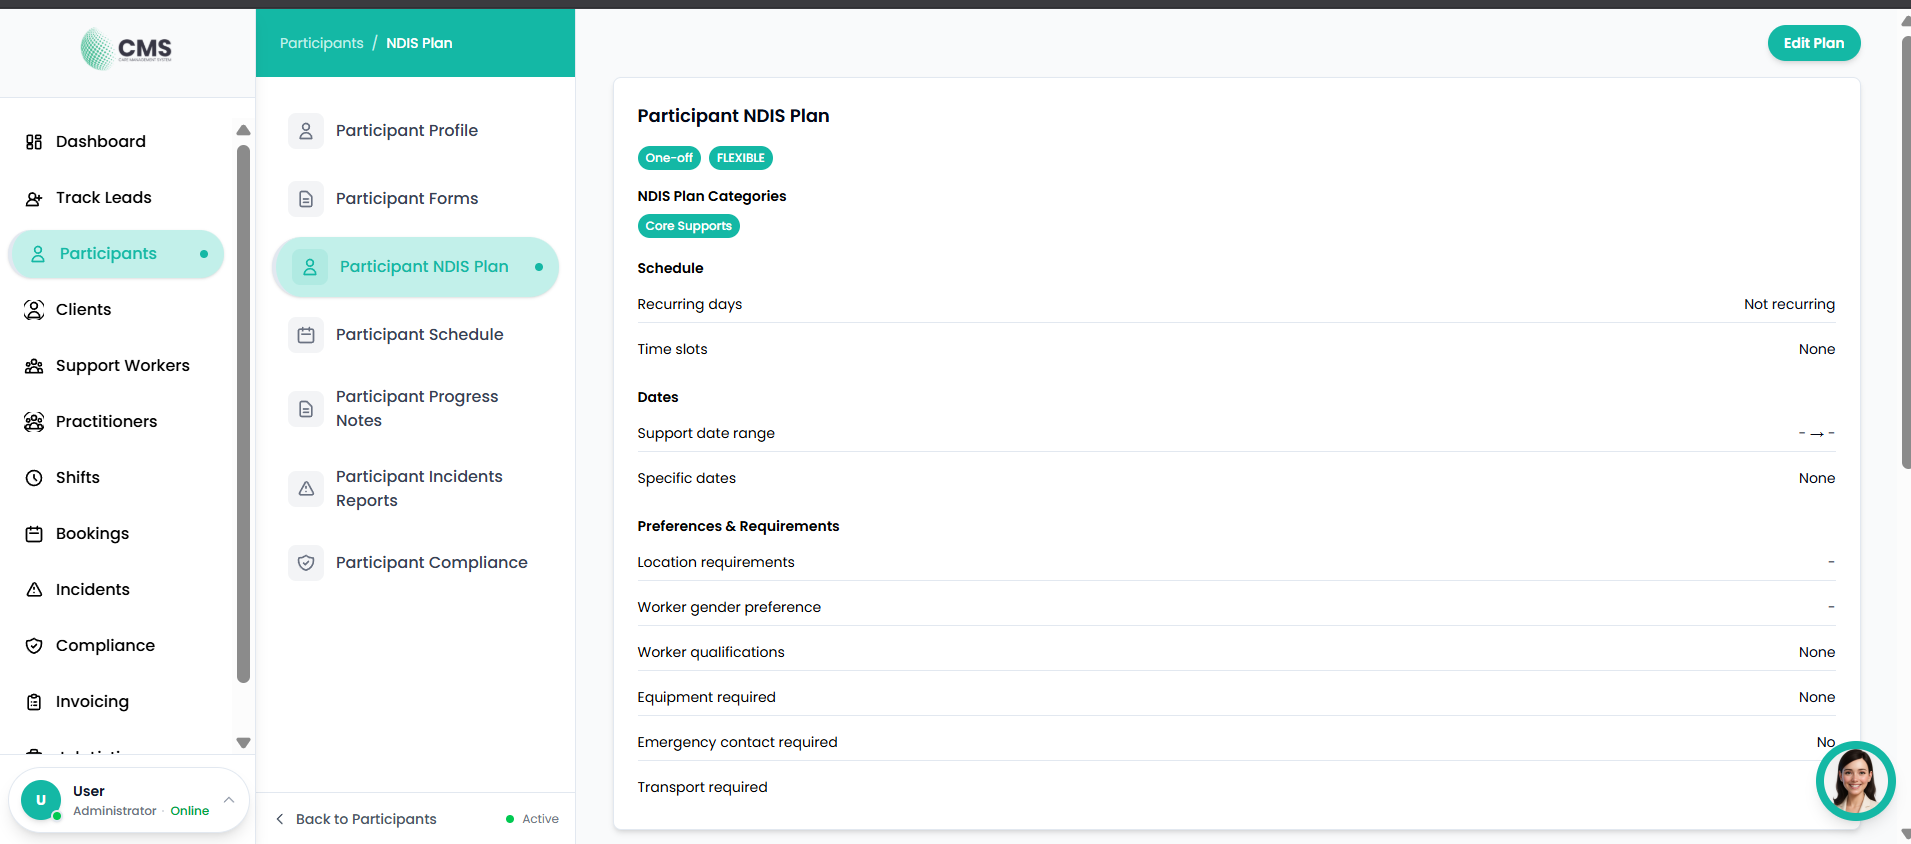
Figure 4.5 — NDIS Plan Tab
Participant Schedule Tab
Calendar view of all scheduled shifts and services.
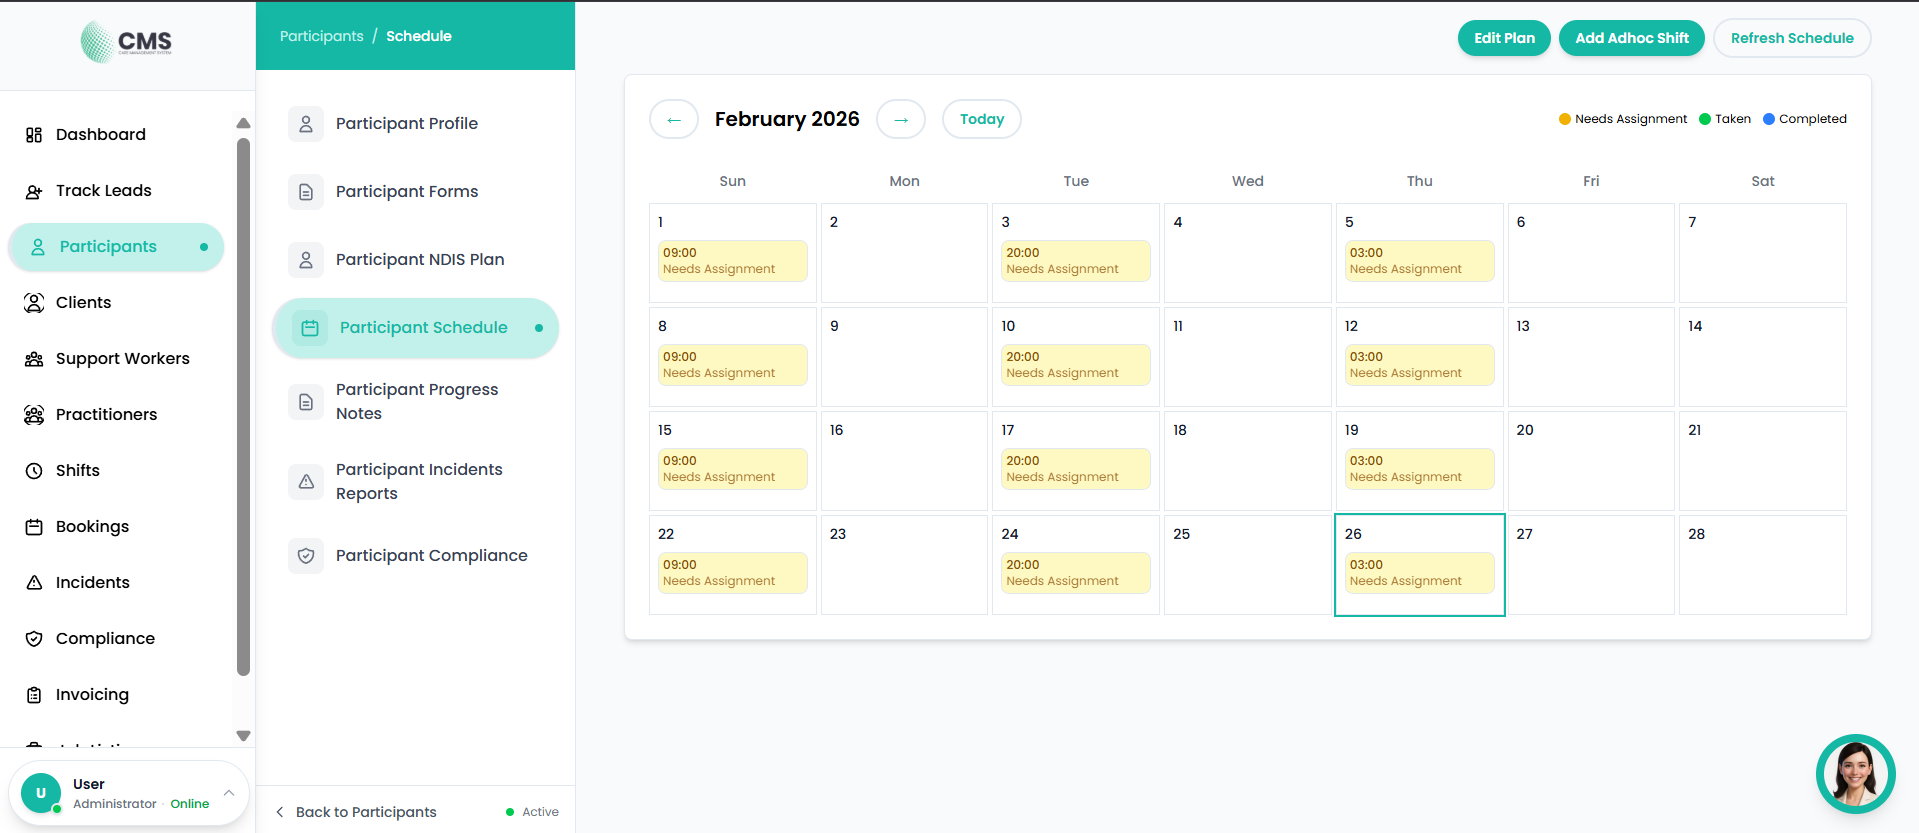
Figure 4.6 — Participant Schedule Tab
Progress Notes Tab
Chronological record of all progress notes.
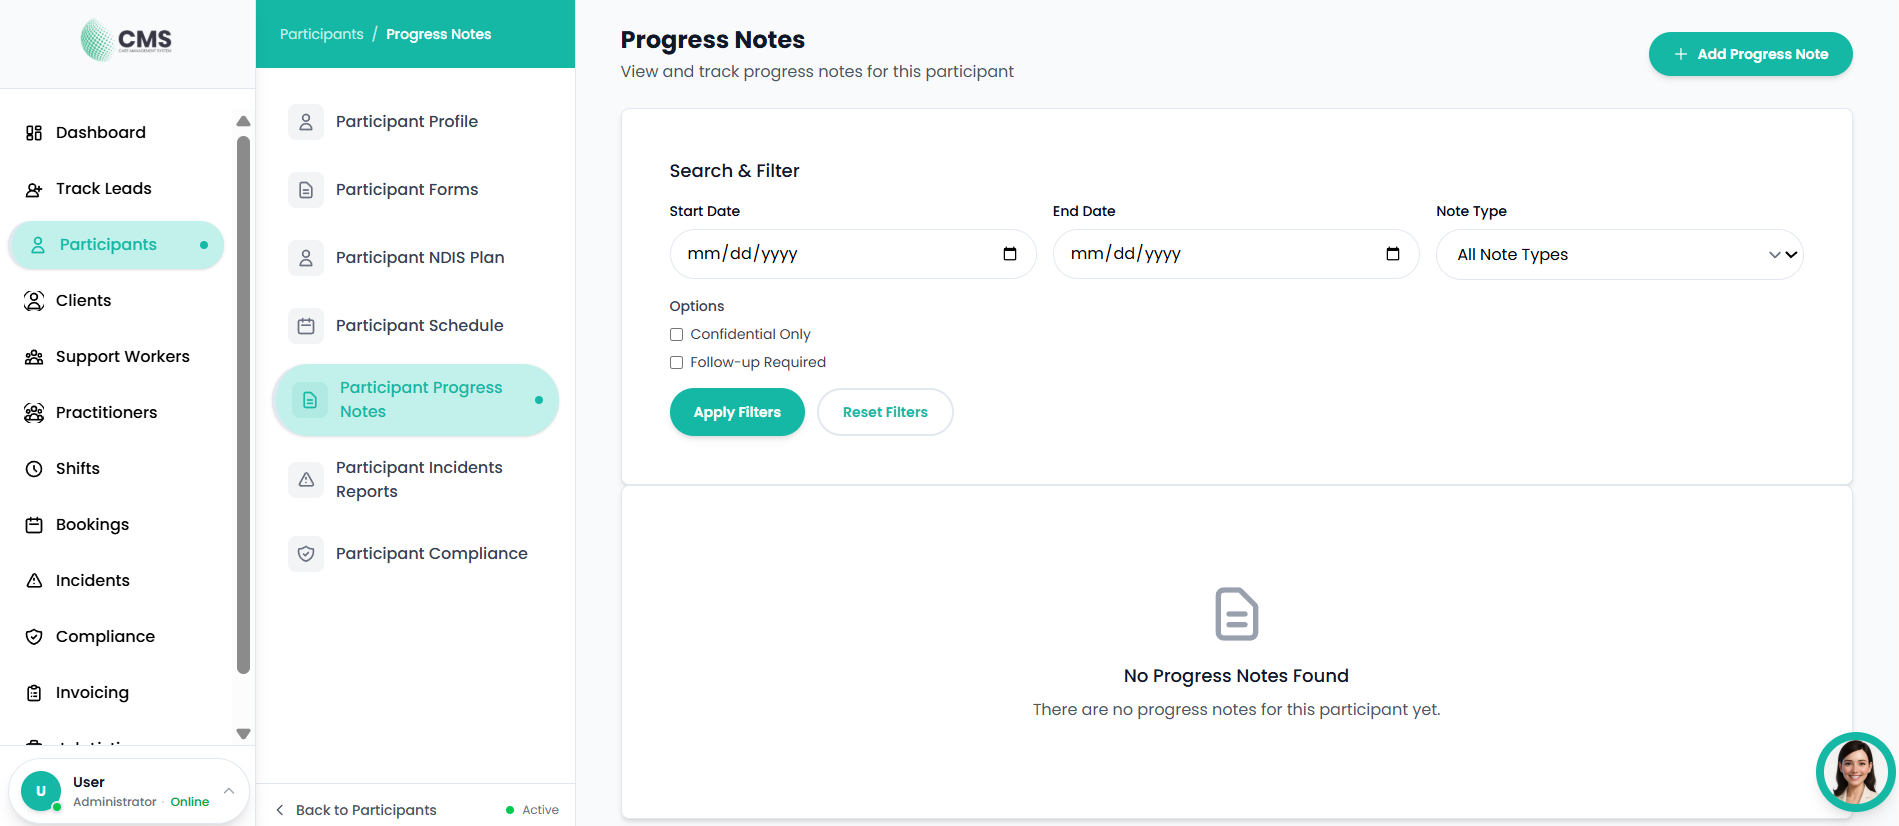
Figure 4.7 — Progress Notes Tab
Participant Compliance Tab
Track compliance items and required documents.
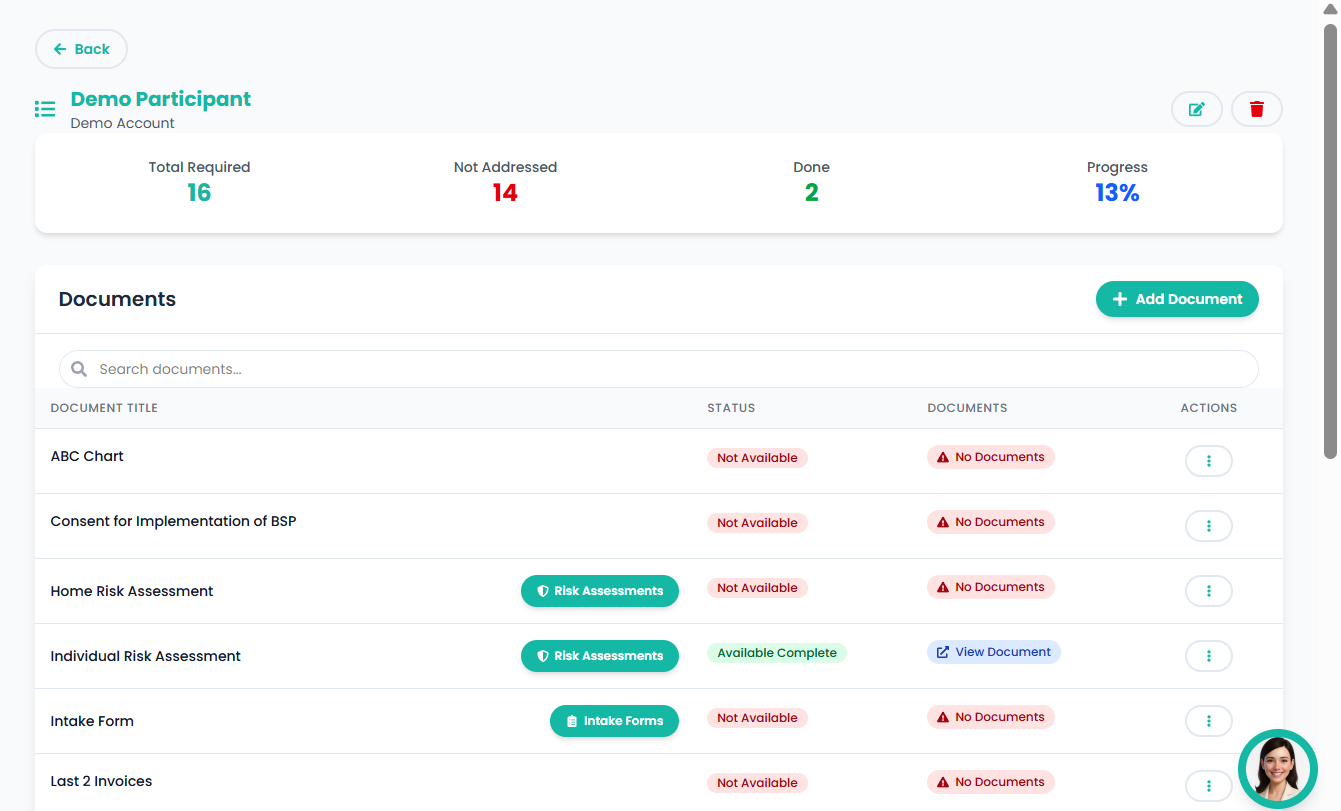
Figure 4.8 — Participant Compliance Tab
5. Client Management
Clients are non-NDIS individuals receiving services. The workflow mirrors participant management.
Clients List
View all clients with search, filter, and statistics cards.
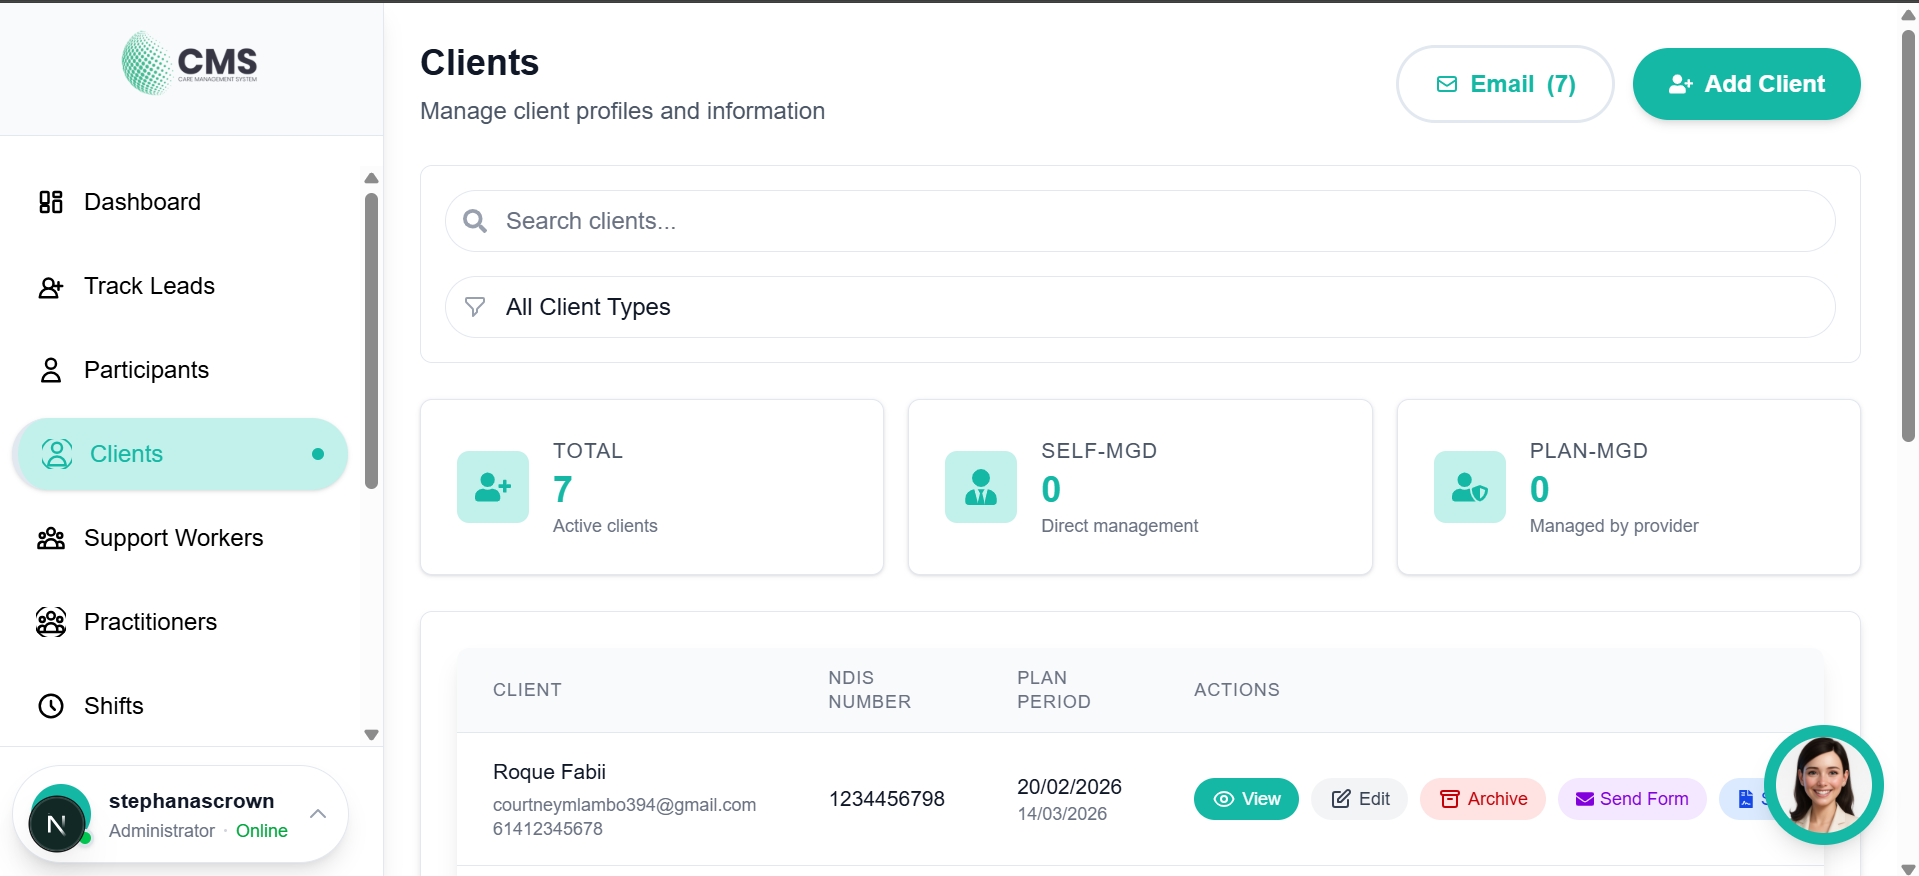
Figure 5.1 — Clients List
Add Client Form
Register a new client with personal details and emergency contact information.
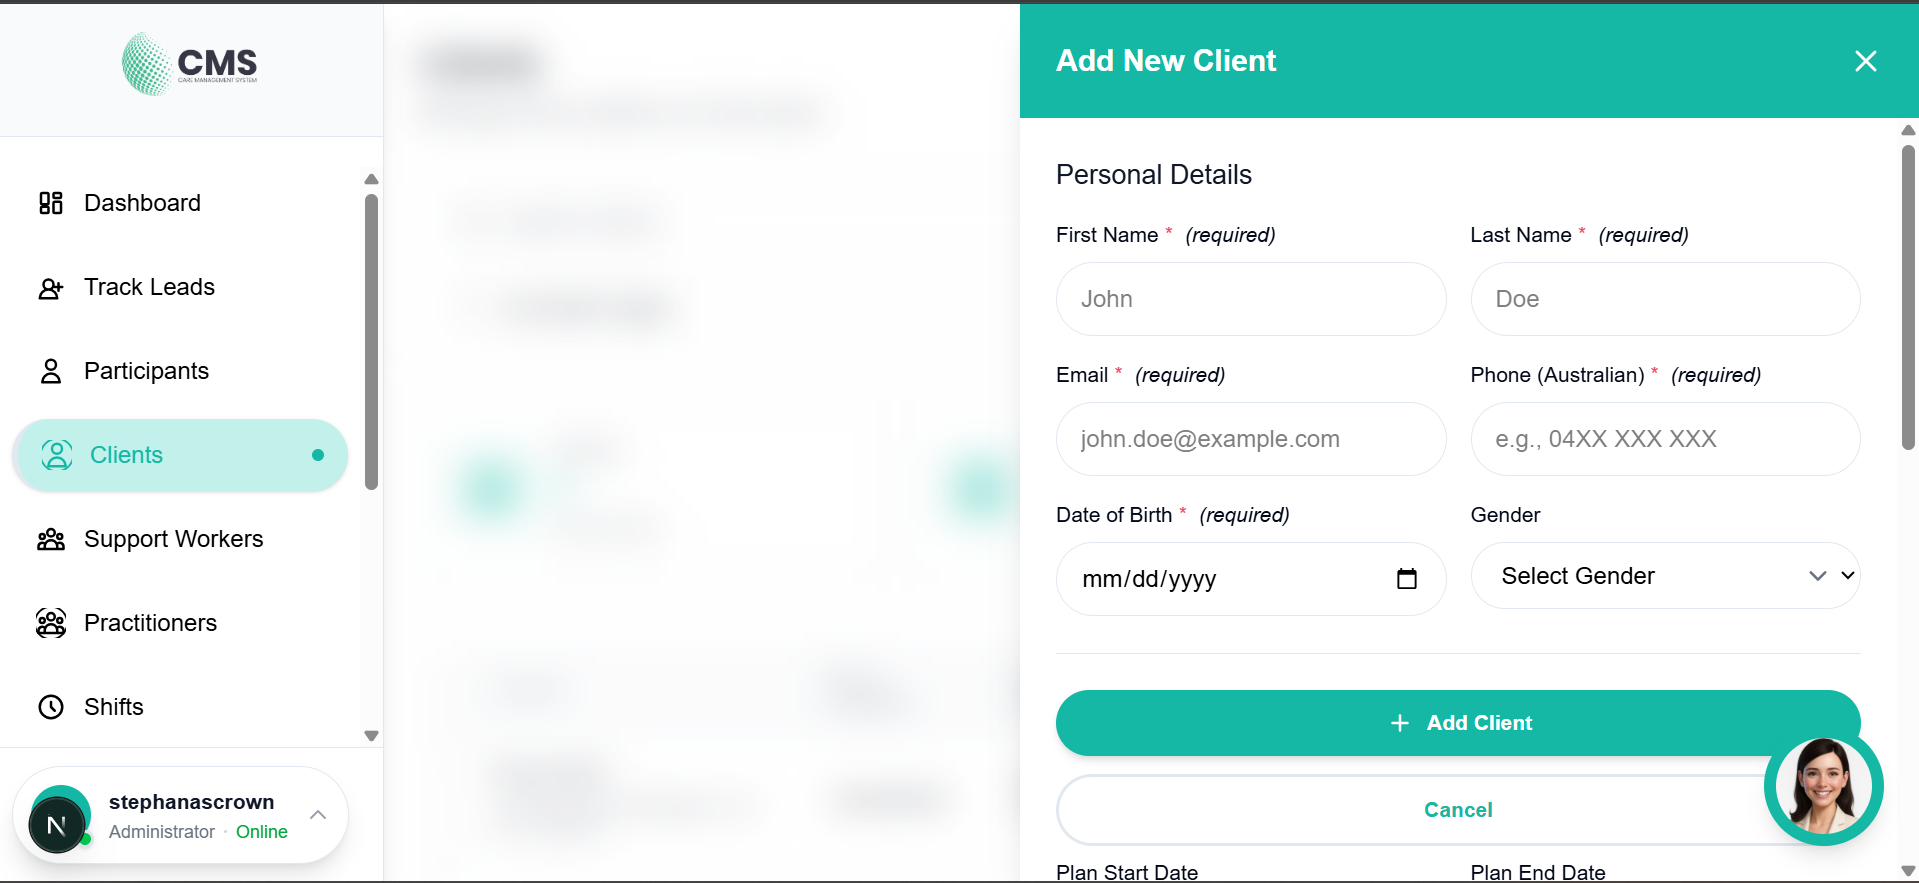
Figure 5.2 — Add Client Form
Client Profile Tab
Central hub for a client's personal and service details.
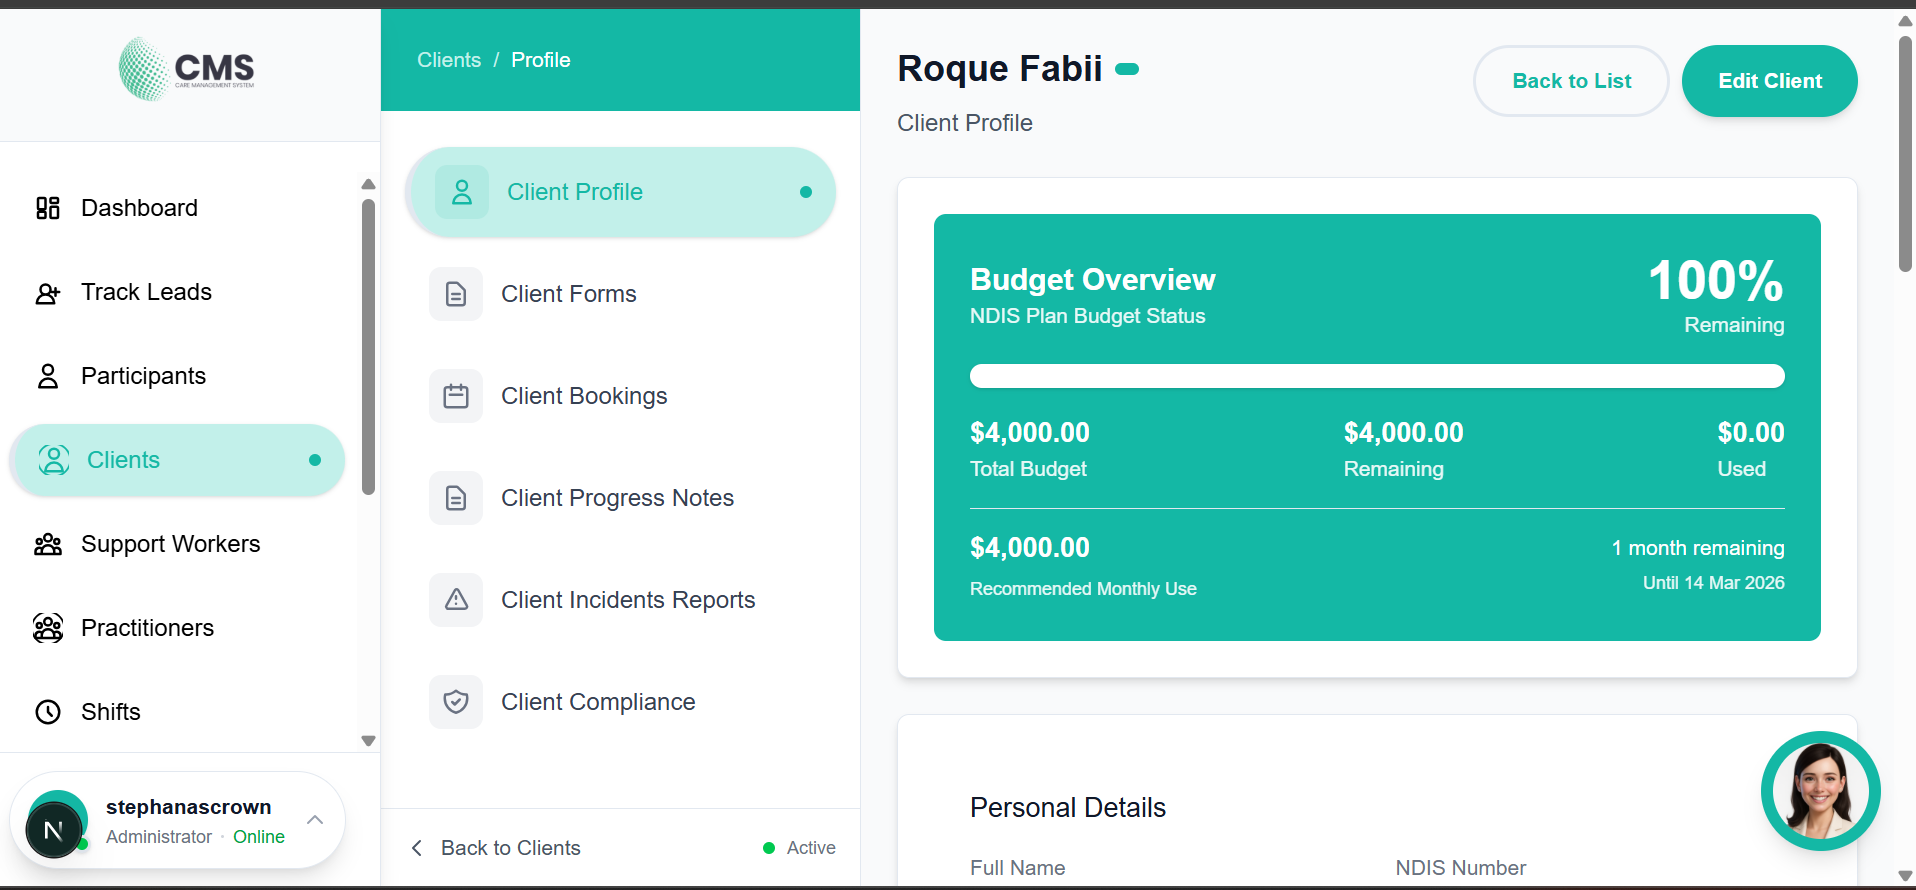
Figure 5.3 — Client Profile Tab
6. Shifts & Scheduling
Create, manage, and track shifts for participants with worker assignments and scheduling tools.
Shifts List
Overview of all shifts with filtering and status indicators.
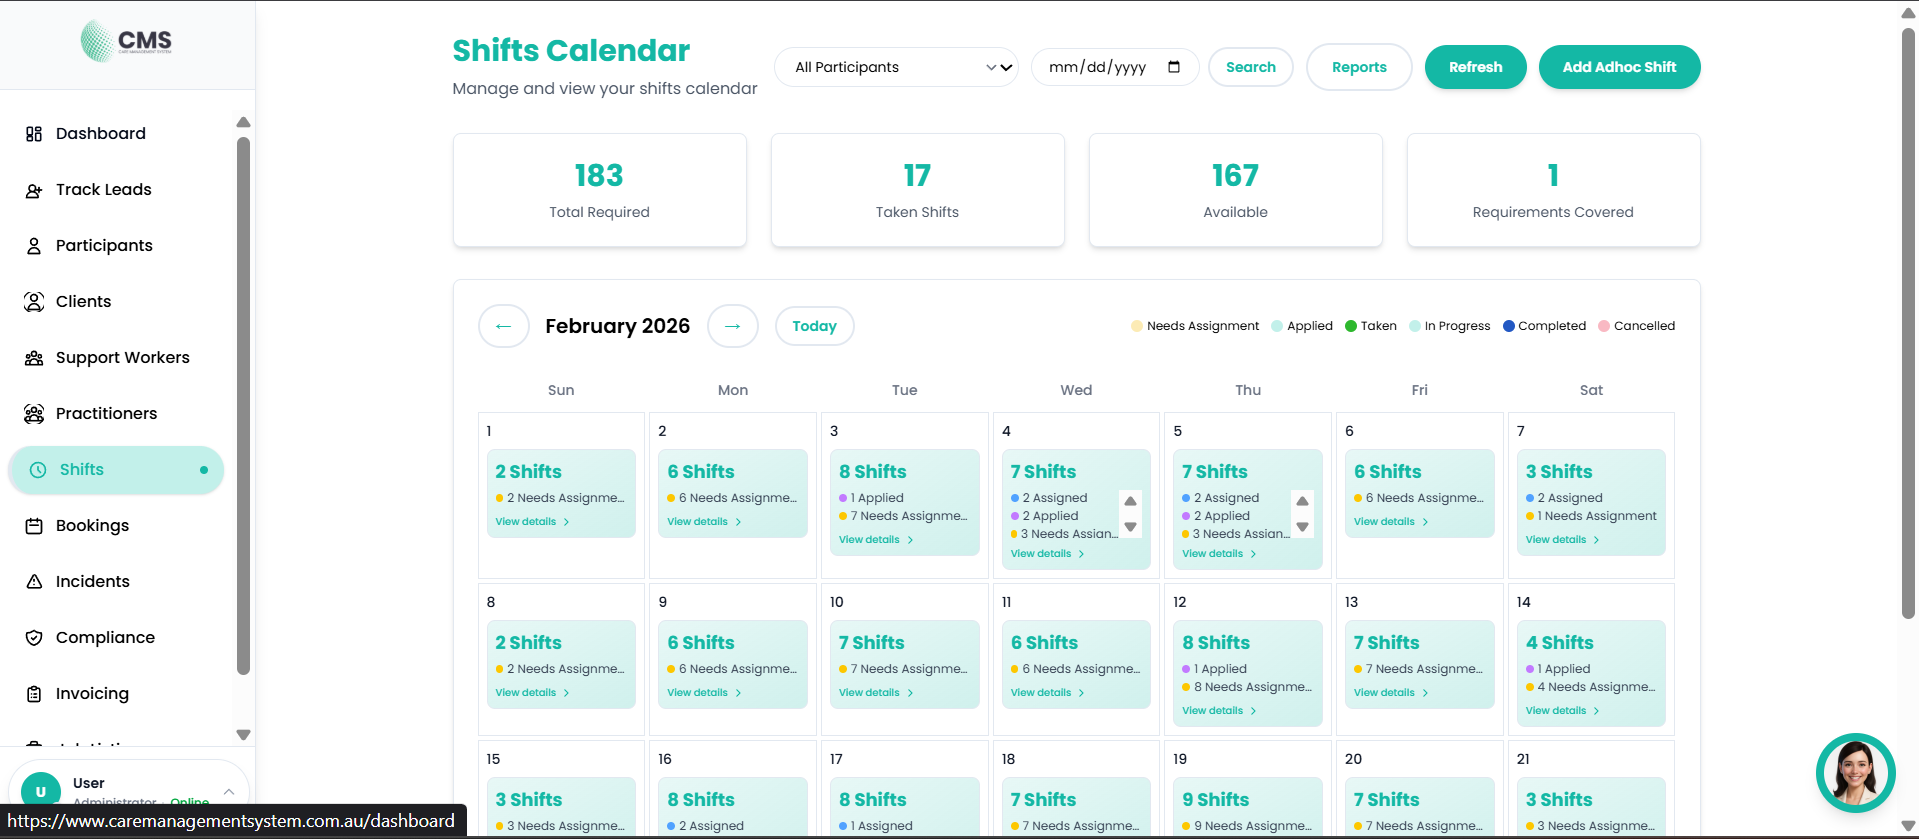
Figure 6.1 — Shifts List
Scheduled Shifts
Upcoming shifts with worker assignments and participant details.
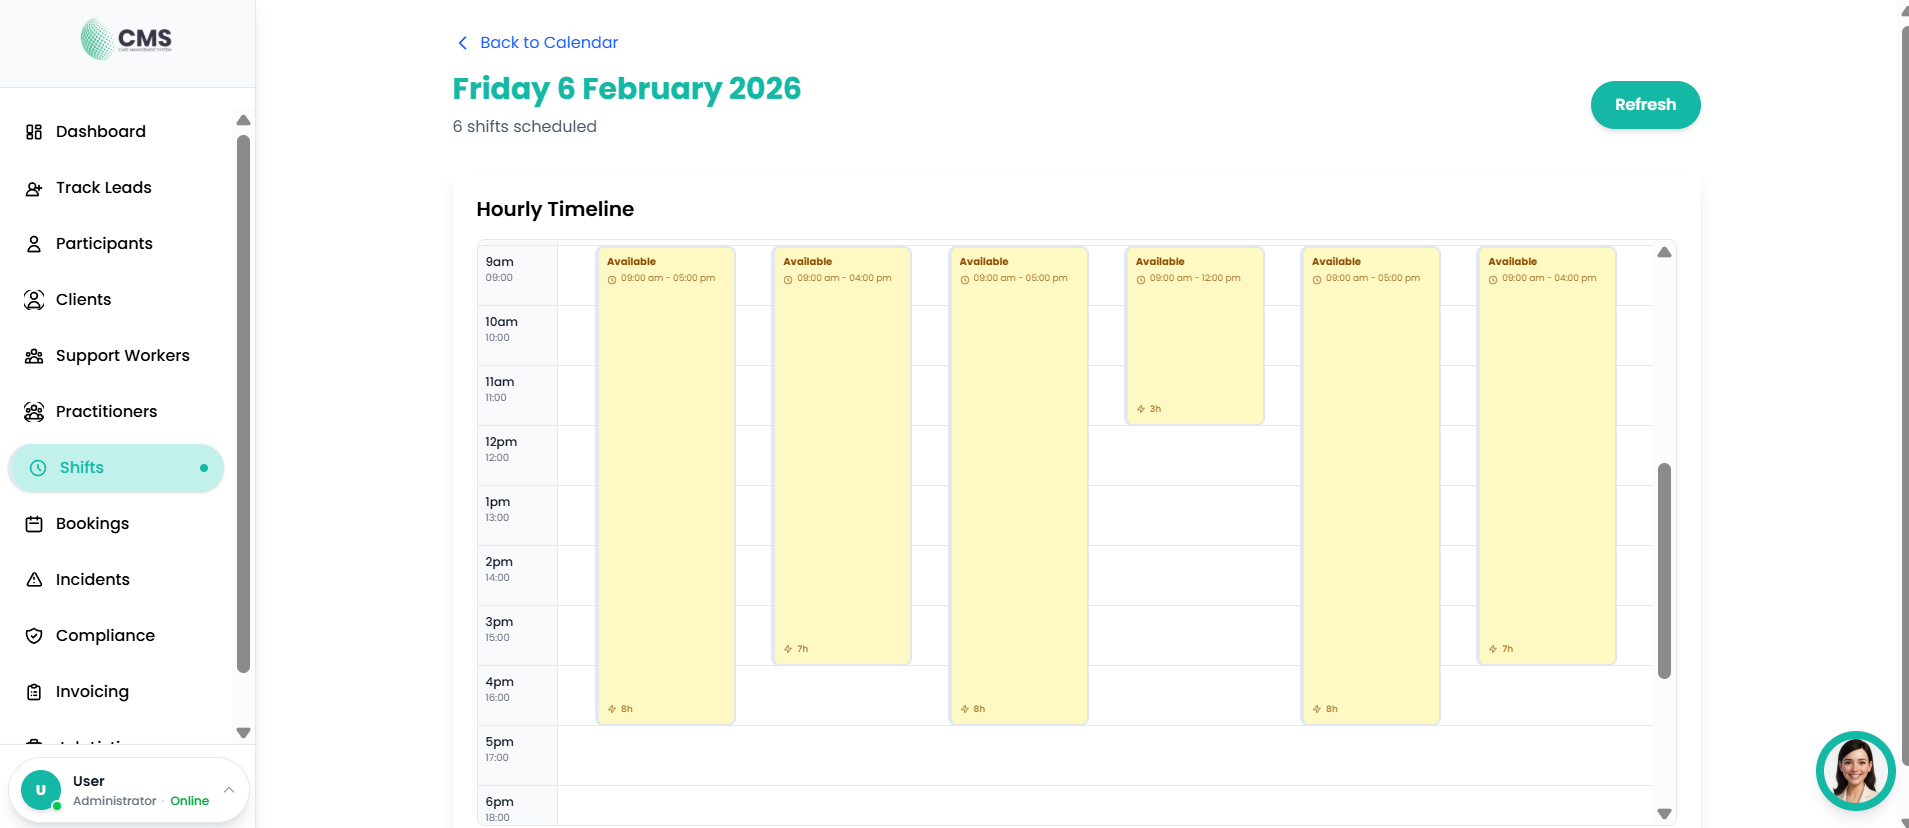
Figure 6.2 — Scheduled Shifts
Shift Detail View
Individual shift information including participant, worker, time, and status.

Figure 6.3 — Shift Detail View
Day View — Participant-Focused Rostering
The Day Shifts screen is designed for roster managers who need to review a single day in detail. Instead of displaying every shift for every participant at once, the screen focuses on one participant at a time — keeping the timeline clean and easy to follow even when a provider manages 50 or more participants.
Participant Summary Cards
At the top of the Day View, a grid of participant summary cards gives an at-a-glance overview of every participant scheduled on that day.
- Name & shift count — participant name with a pill showing how many shifts they have that day
- Total hours — combined duration of all their shifts
- Status dots — green (Covered/Taken), orange (Applied/Pending), red (Open/Available) — gaps are immediately visible without reading individual shifts
- Time ranges — each shift time shown directly on the card (up to 3 shown; "+N more" if there are additional shifts)
- Click to select — clicking any card selects that participant and scrolls down to their hourly timeline below
Participant Selector & Hourly Timeline
Below the summary cards, the hourly timeline shows shifts for the selected participant only.
- 1Open the Day View from the Shifts screen by clicking a specific date.
- 2The screen loads with the first participant from the API pre-selected by default.
- 3Use the Participant dropdown in the header, or click any summary card above the timeline, to switch between participants.
- 4The hourly timeline updates instantly to show only that participant's shifts for the day.
- 5The subtitle beneath the date confirms whose schedule you are viewing (e.g. "3 shifts for Jane Smith").
Partial Shift Slots
When a support worker applies for only part of a shift (a partial shift), the time slot they have selected is automatically hidden from other workers browsing available shifts. This prevents two workers from accidentally applying for the same hours.
- A worker selects their available start and end time within the shift window
- Once submitted, that specific time slot is no longer shown as available to other workers
- The remainder of the shift (if any) remains visible for another worker to claim
7. Bookings
Manage appointment-based services with practitioners including availability, booking links, and scheduling.
Bookings List
Overview of all bookings with status filters and appointment details.
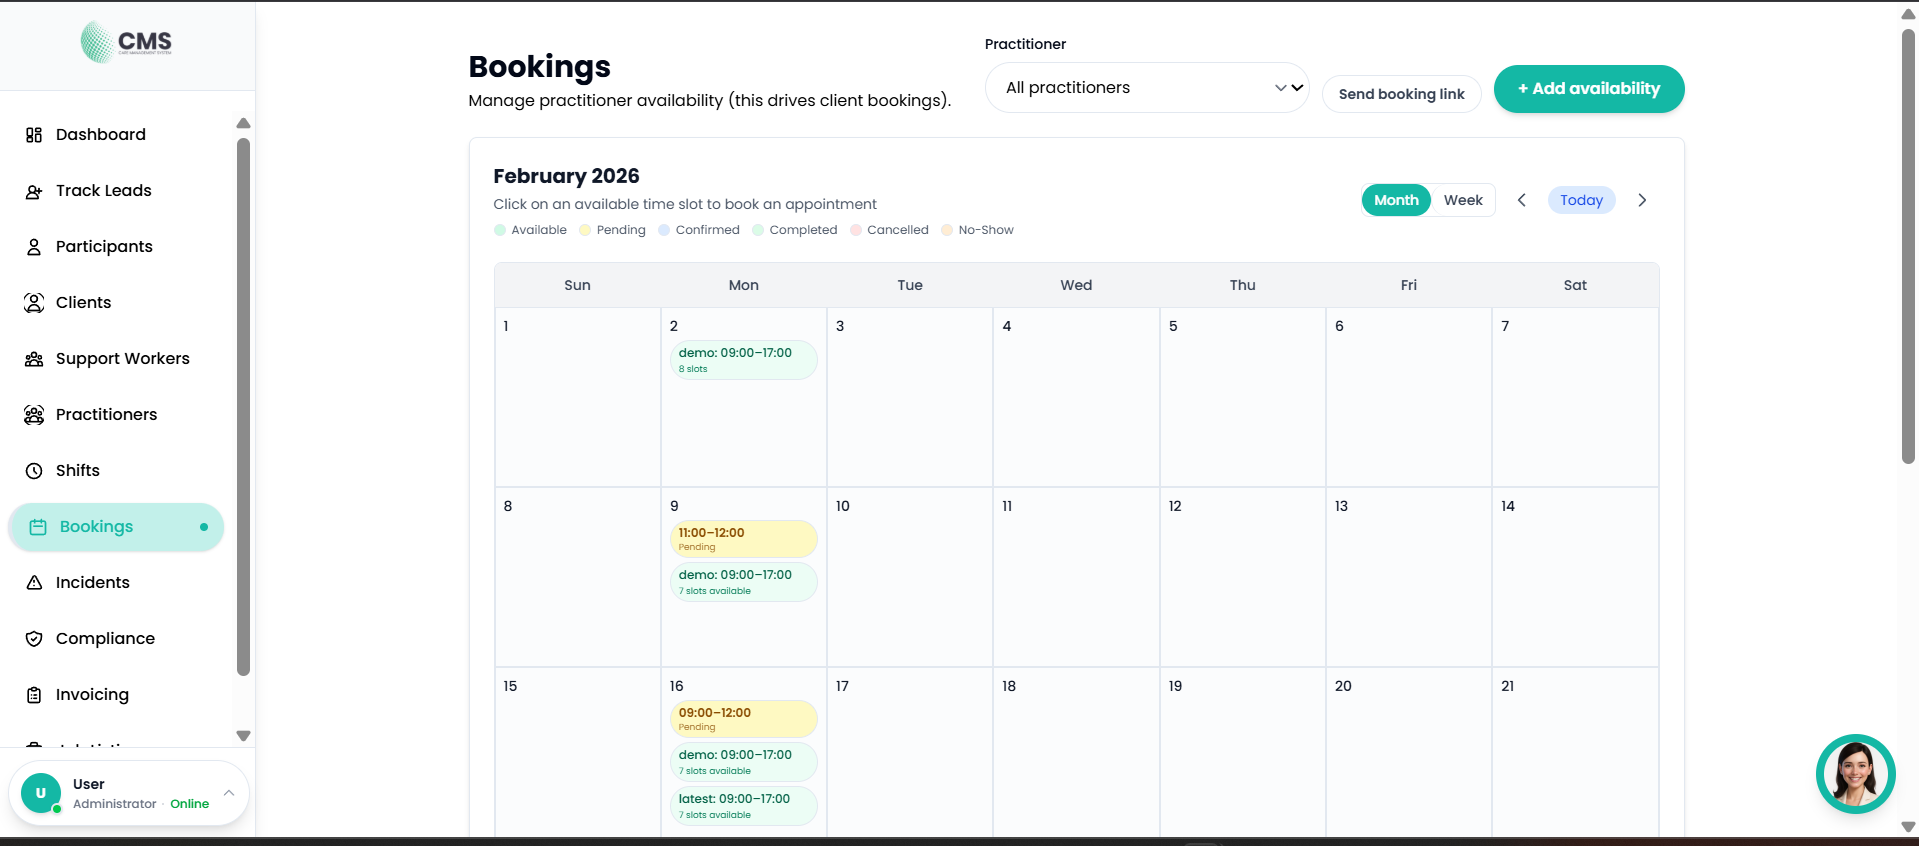
Figure 7.1 — Bookings List
Booking Details
Full appointment information with client, practitioner, and service details.
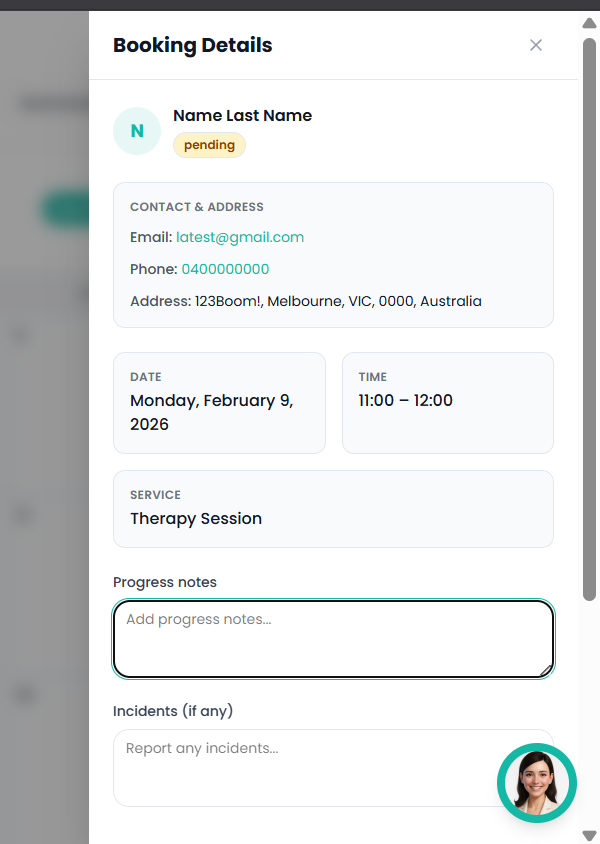
Figure 7.2 — Booking Details
Practitioner Availability Calendar
Weekly availability schedule for practitioners.
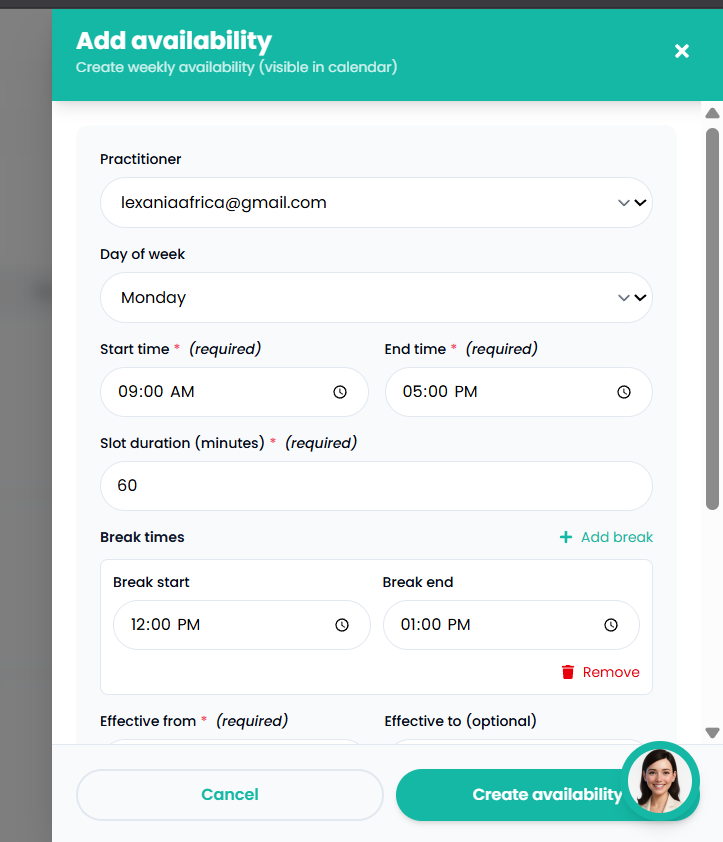
Figure 7.3 — Practitioner Availability
8. Incident Reports
Record, track, and manage incident reports for both participants and clients.
Incident Reports List
All incident reports with status, severity, and resolution tracking.
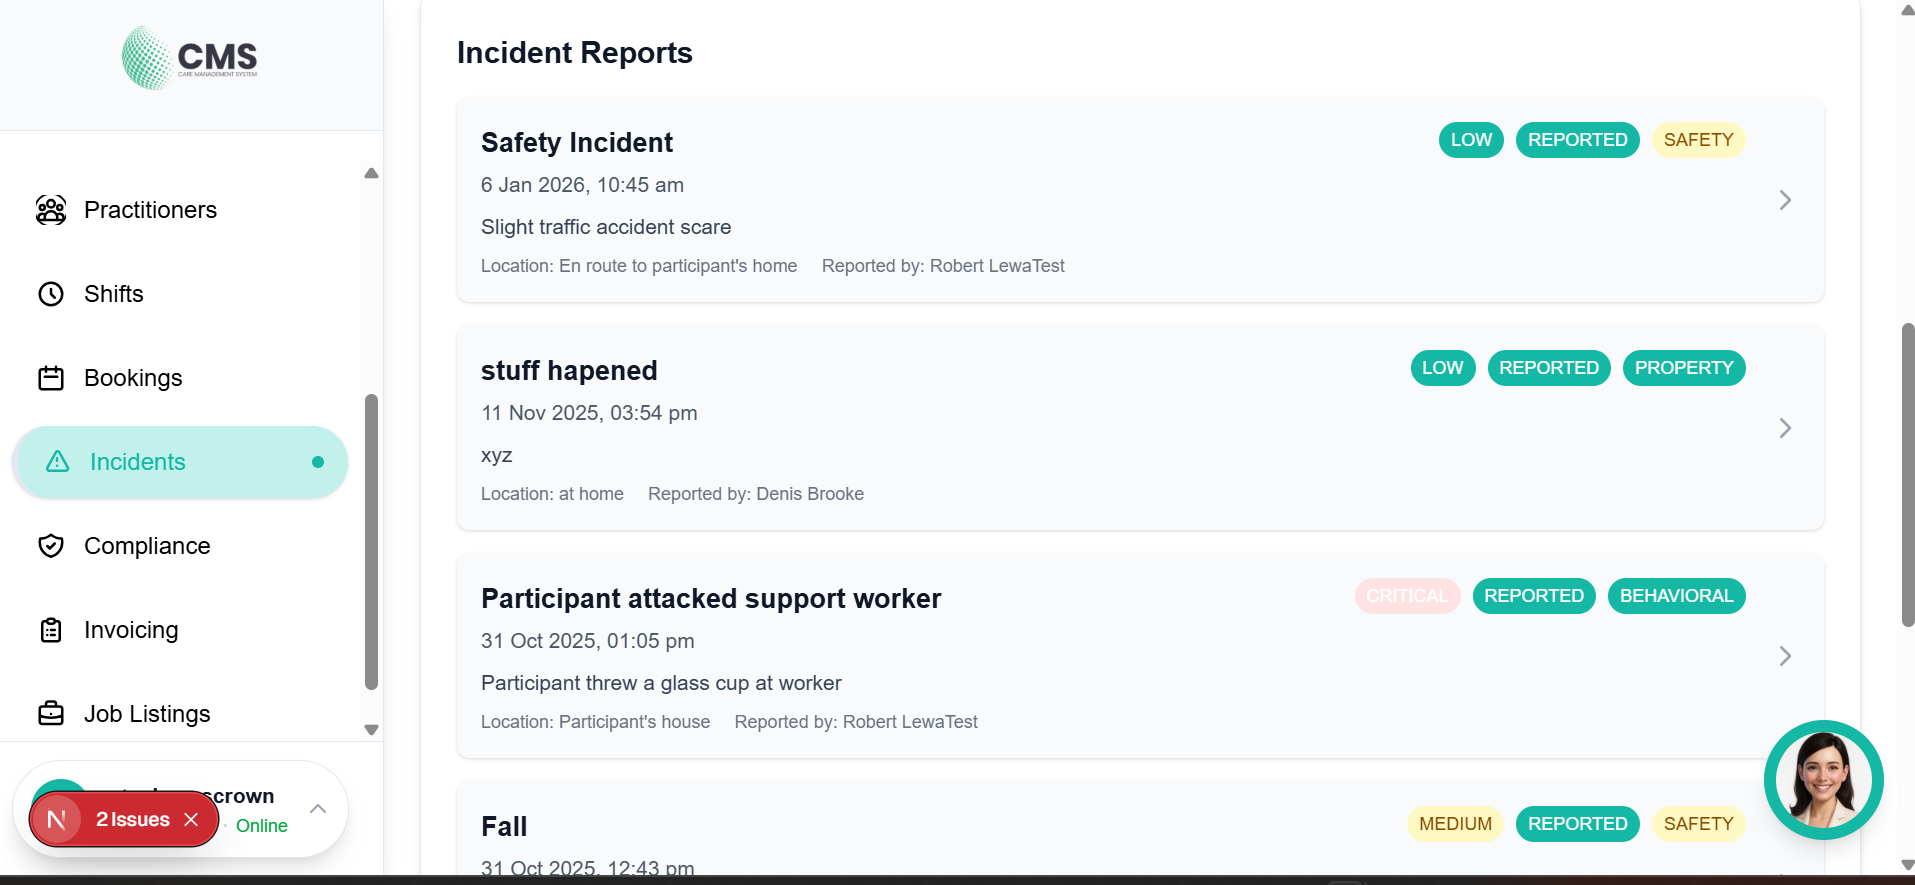
Figure 8.1 — Incident Reports List
Create Incident Report
Log a new incident with type, severity, description, and supporting evidence.

Figure 8.2 — Create Incident Report
9. Invoicing
Generate NDIS-compliant invoices from approved timesheets and manage billing across your organisation.
Invoices List
Overview of all invoices with status, amounts, and participant details.
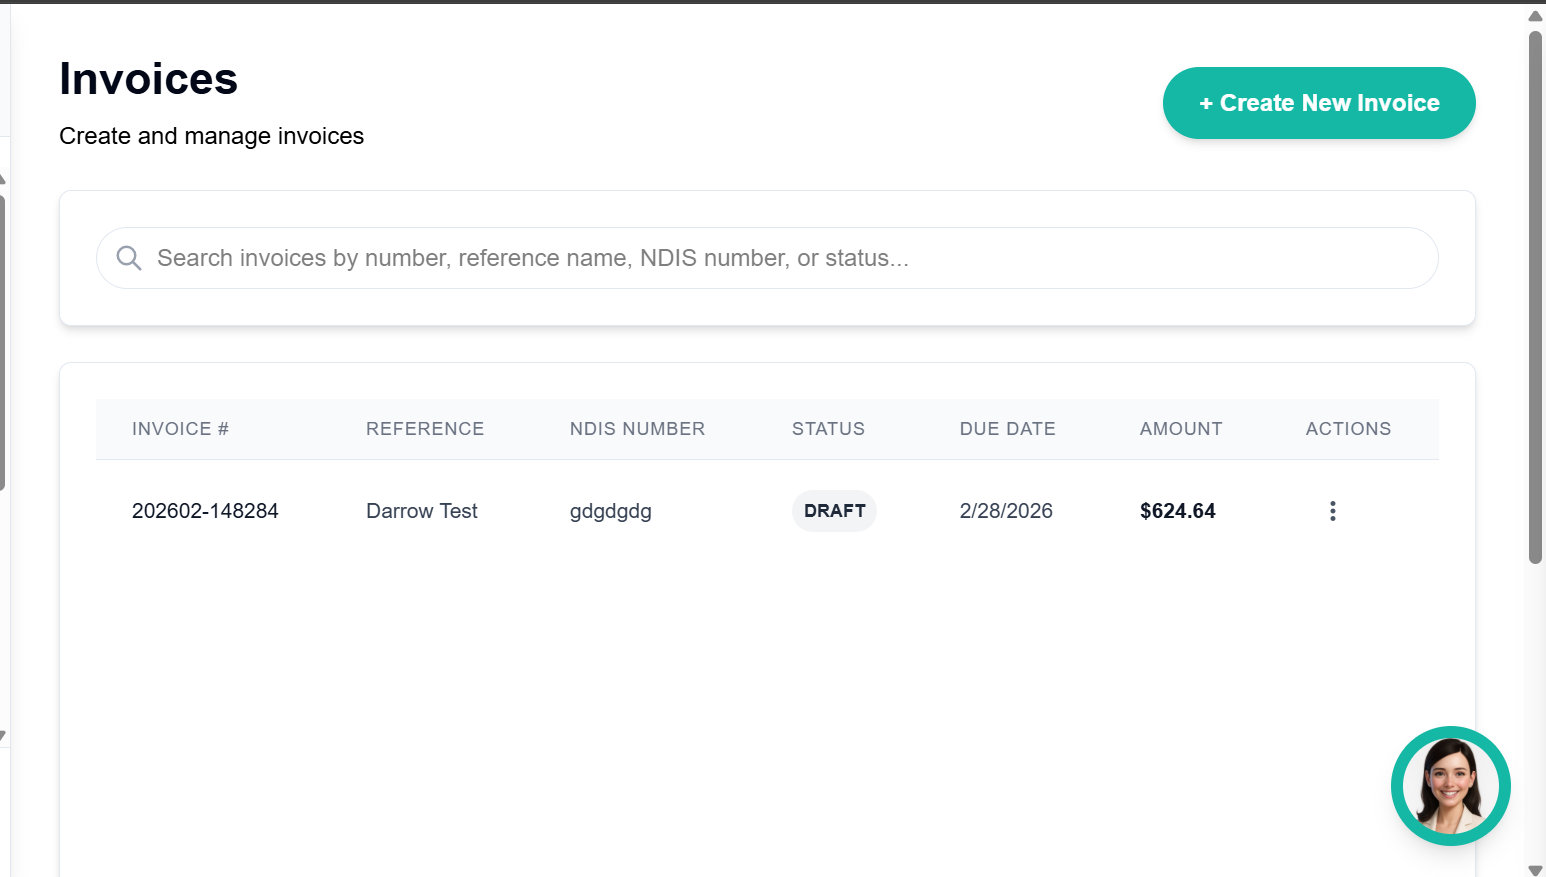
Figure 9.1 — Invoices List
Create Invoice Form
Invoice creation with participant selection, line items, and auto-calculated totals.
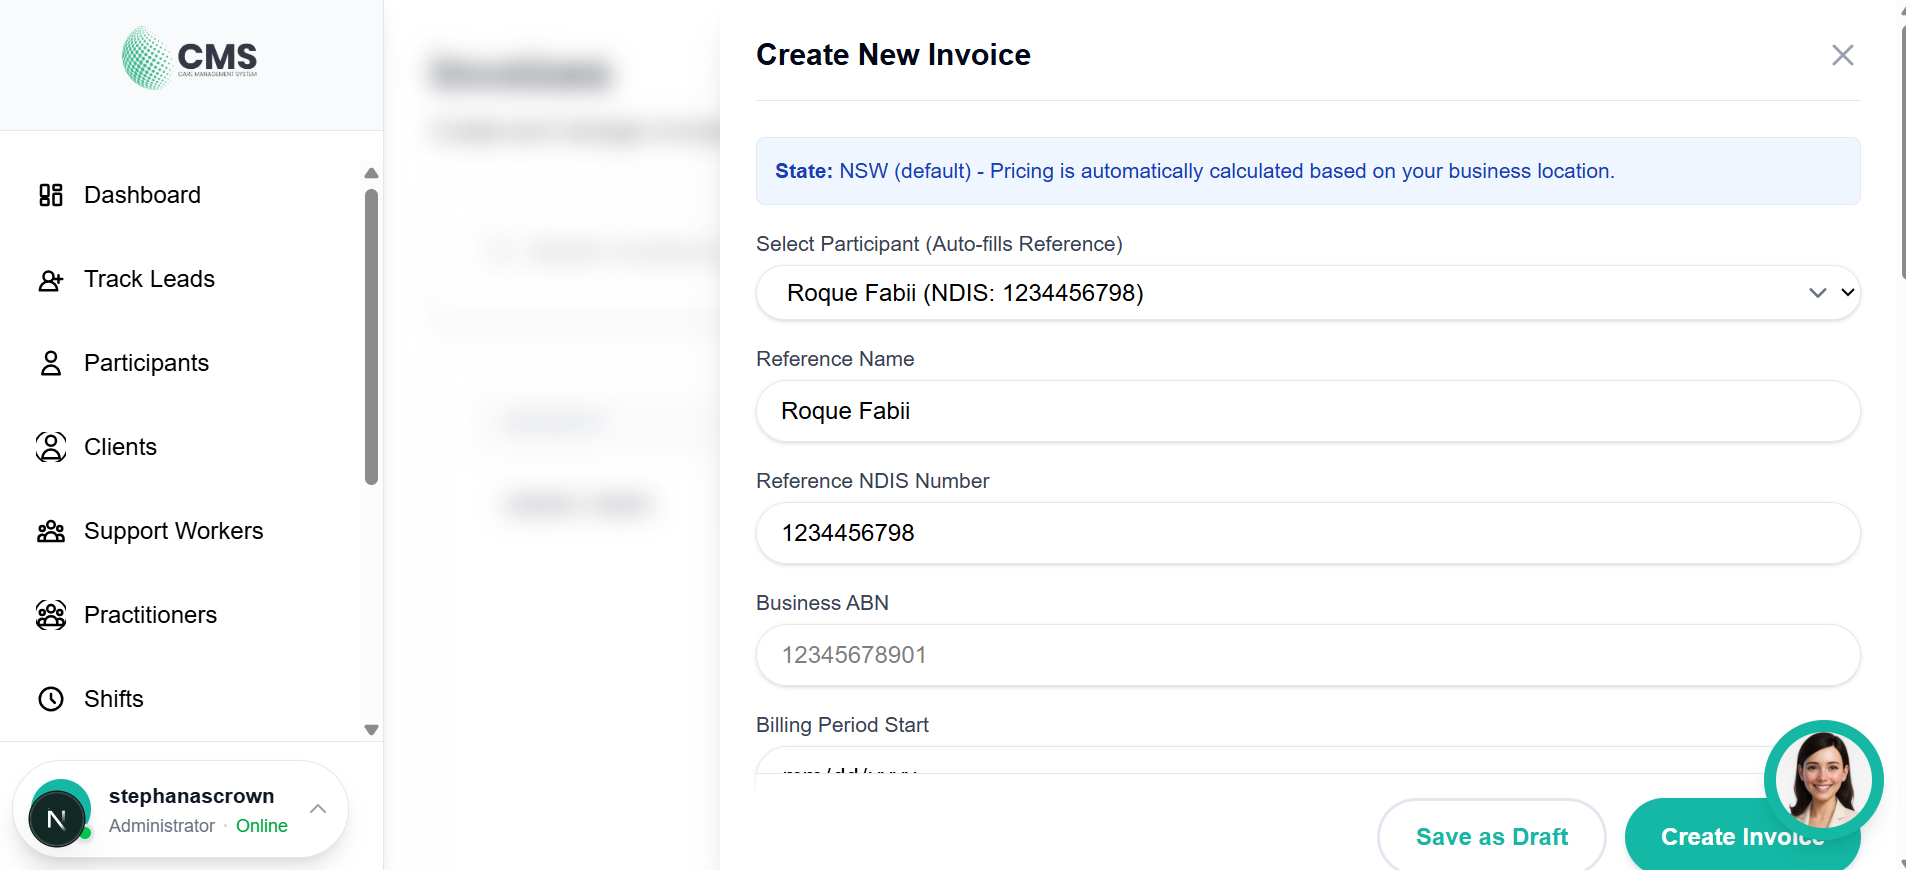
Figure 9.2 — Create Invoice Form
Invoice Actions Menu
Available actions for managing invoices including export and payment updates.
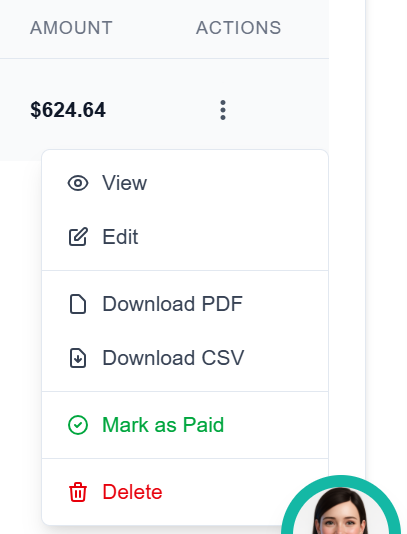
Figure 9.3 — Invoice Actions Menu
10. Compliance & Audit Readiness
Maintain NDIS compliance and stay audit-ready with built-in tracking tools across categories: Governance, Policies and Procedures, HR, and Participants.
- 1Navigate to Compliance in the sidebar.
- 2View your organisation's overall compliance status with percentage progress.
- 3Review status breakdown: Not Available, Complete, Incomplete, Not Applicable, Elsewhere, Expired.
- 4Click on any category tab to view and manage its audit items.
- 5Upload documents, update statuses, and address flagged items.
Compliance Dashboard
Organisation-wide compliance overview — monitor audit readiness and track category progress.
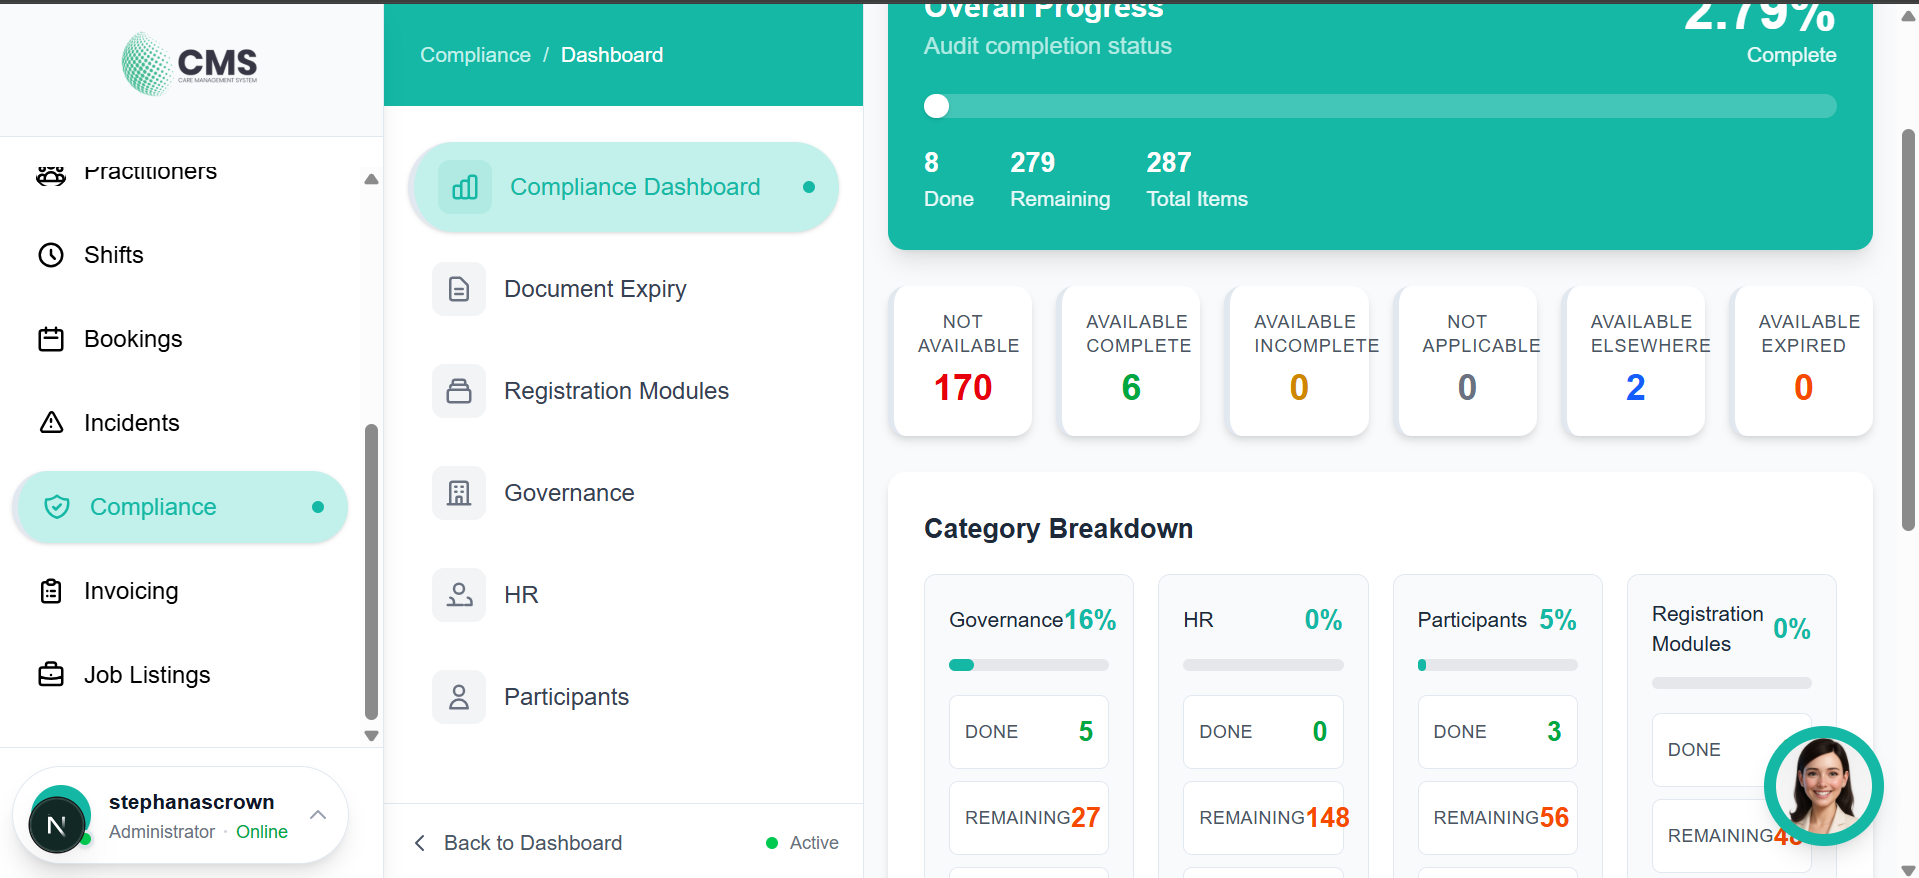
Figure 10.1 — Compliance Dashboard
Governance Tab
Review governance-related compliance items including policies and procedures.
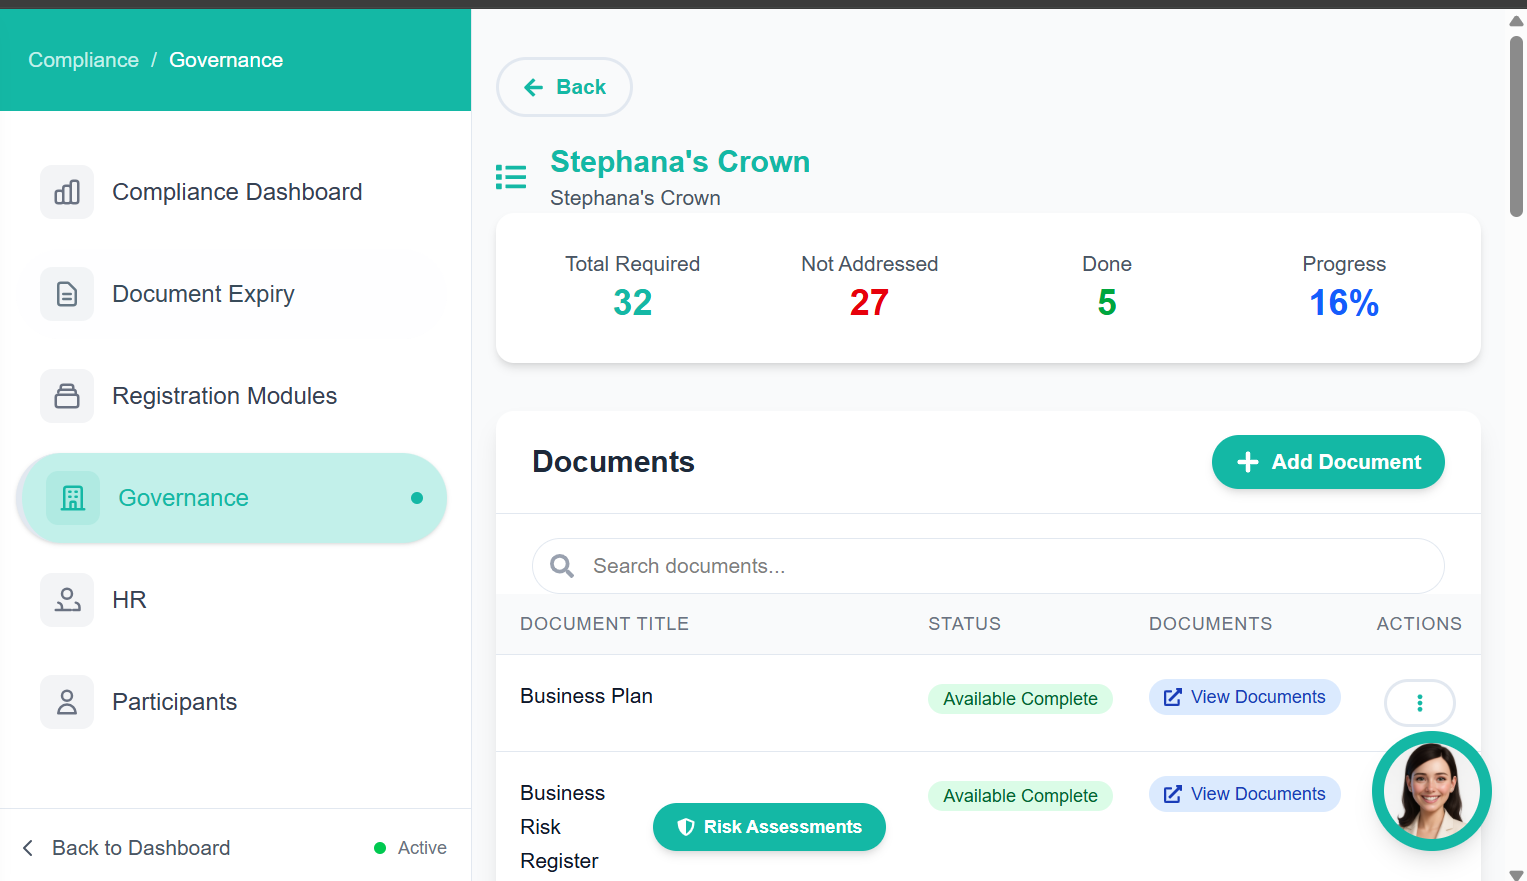
Figure 10.2 — Governance Tab
HR Compliance Tab
Manage staff compliance documentation including clearances and certifications.

Figure 10.3 — HR Compliance Tab
Document Expiry Tracking
Monitor worker document expiry dates and take action on expiring compliance items.
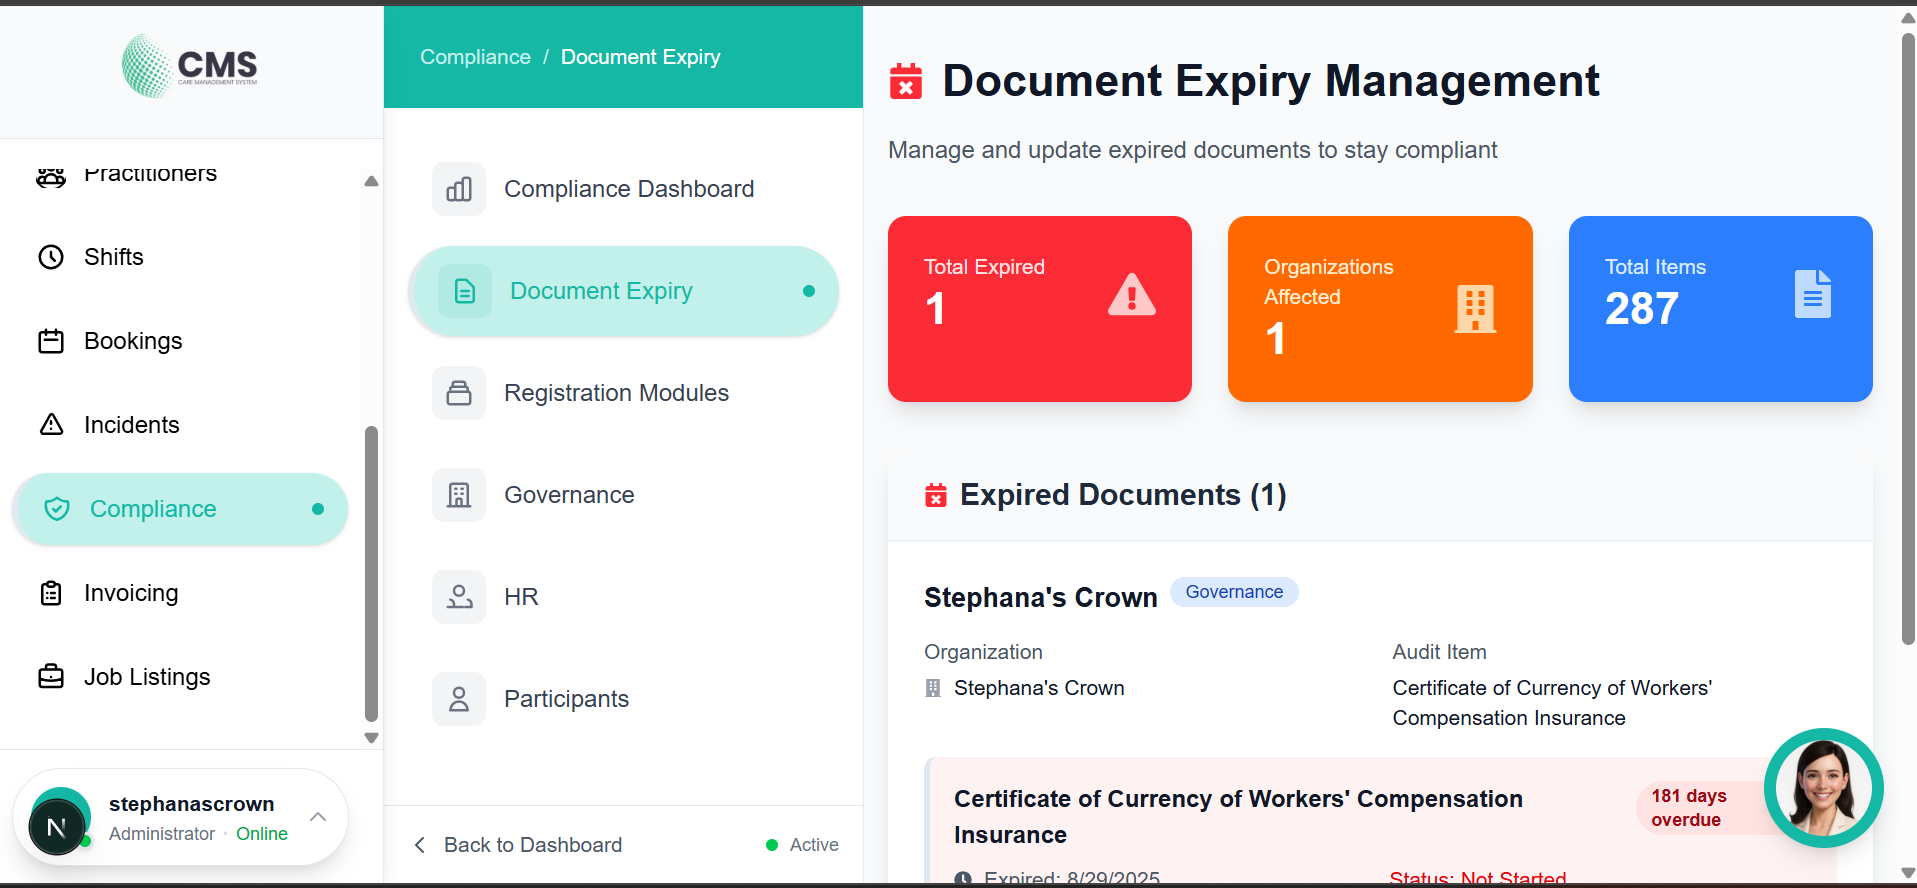
Figure 10.4 — Document Expiry Tracking
11. Managing Support Workers
View worker lists, add new workers, and manage profiles, compliance, shifts, timesheets, and salary from the admin portal.
Support Workers List (Admin)
View and manage all support workers registered with your organisation.
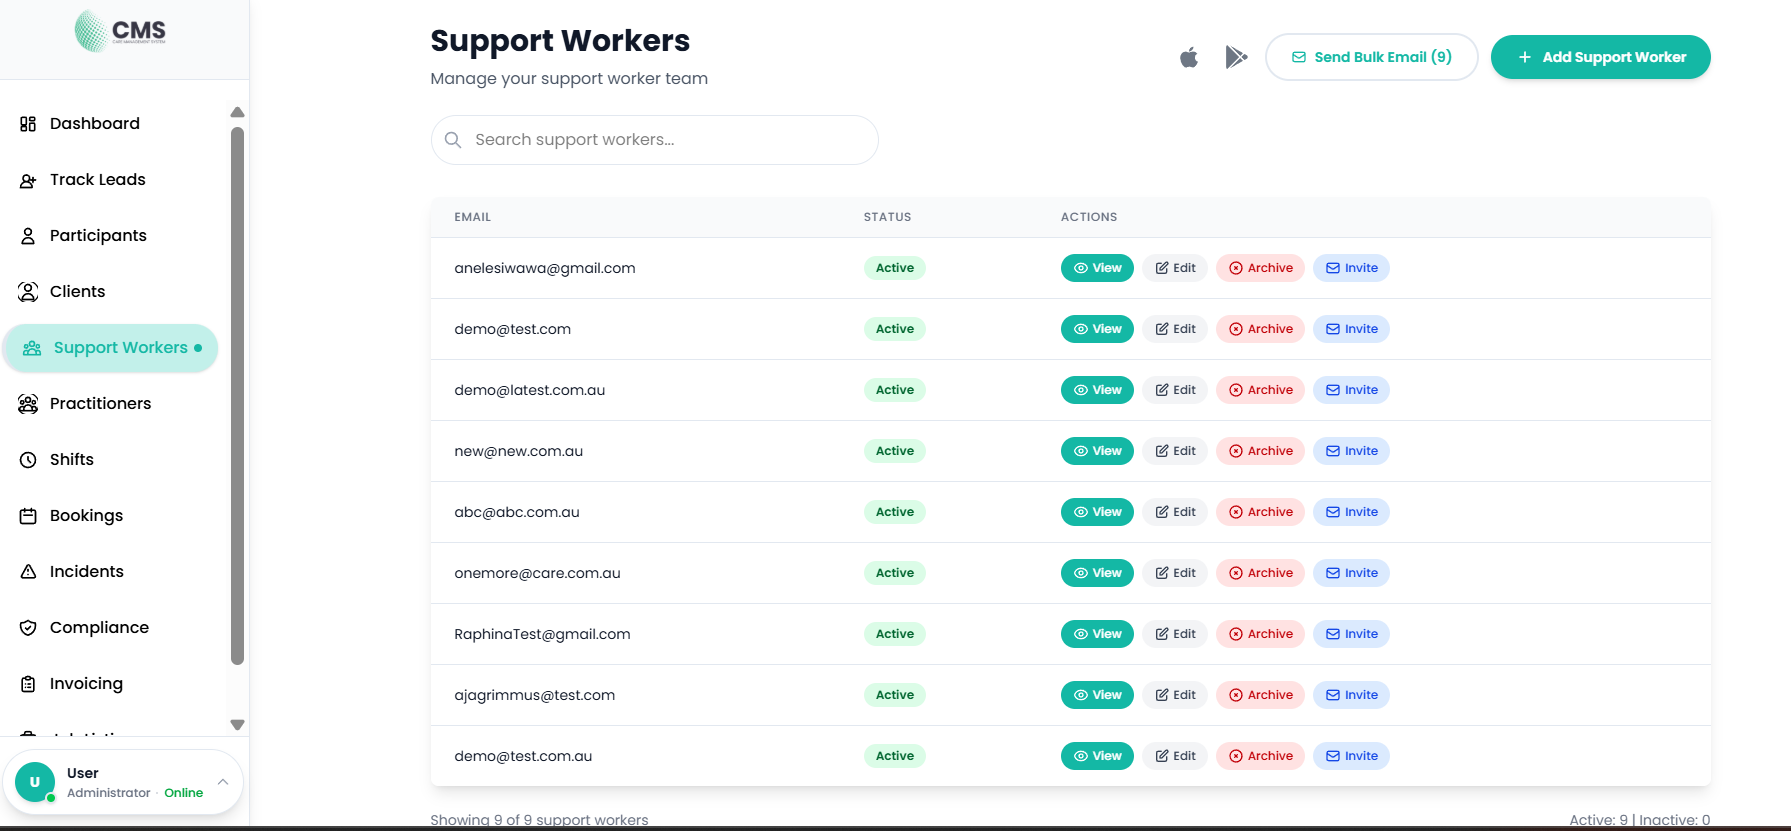
Figure 11.1 — Support Workers List
Add Support Worker (Admin)
Invite a new support worker by entering their details.
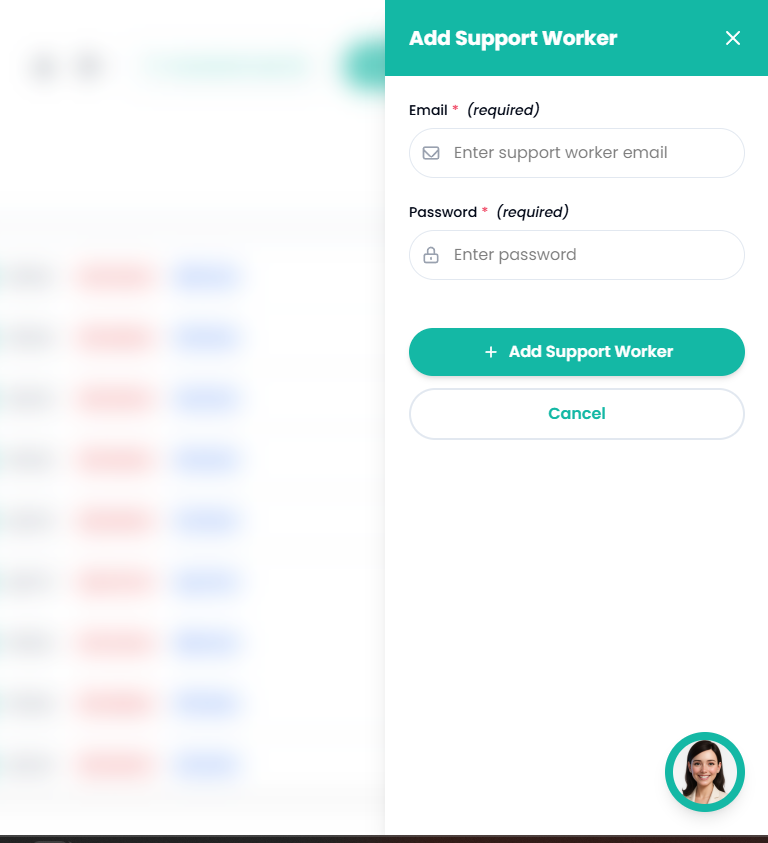
Figure 11.2 — Add Support Worker
Worker Profile (Admin View)
View and edit a worker's personal details, contact information, and employment record.
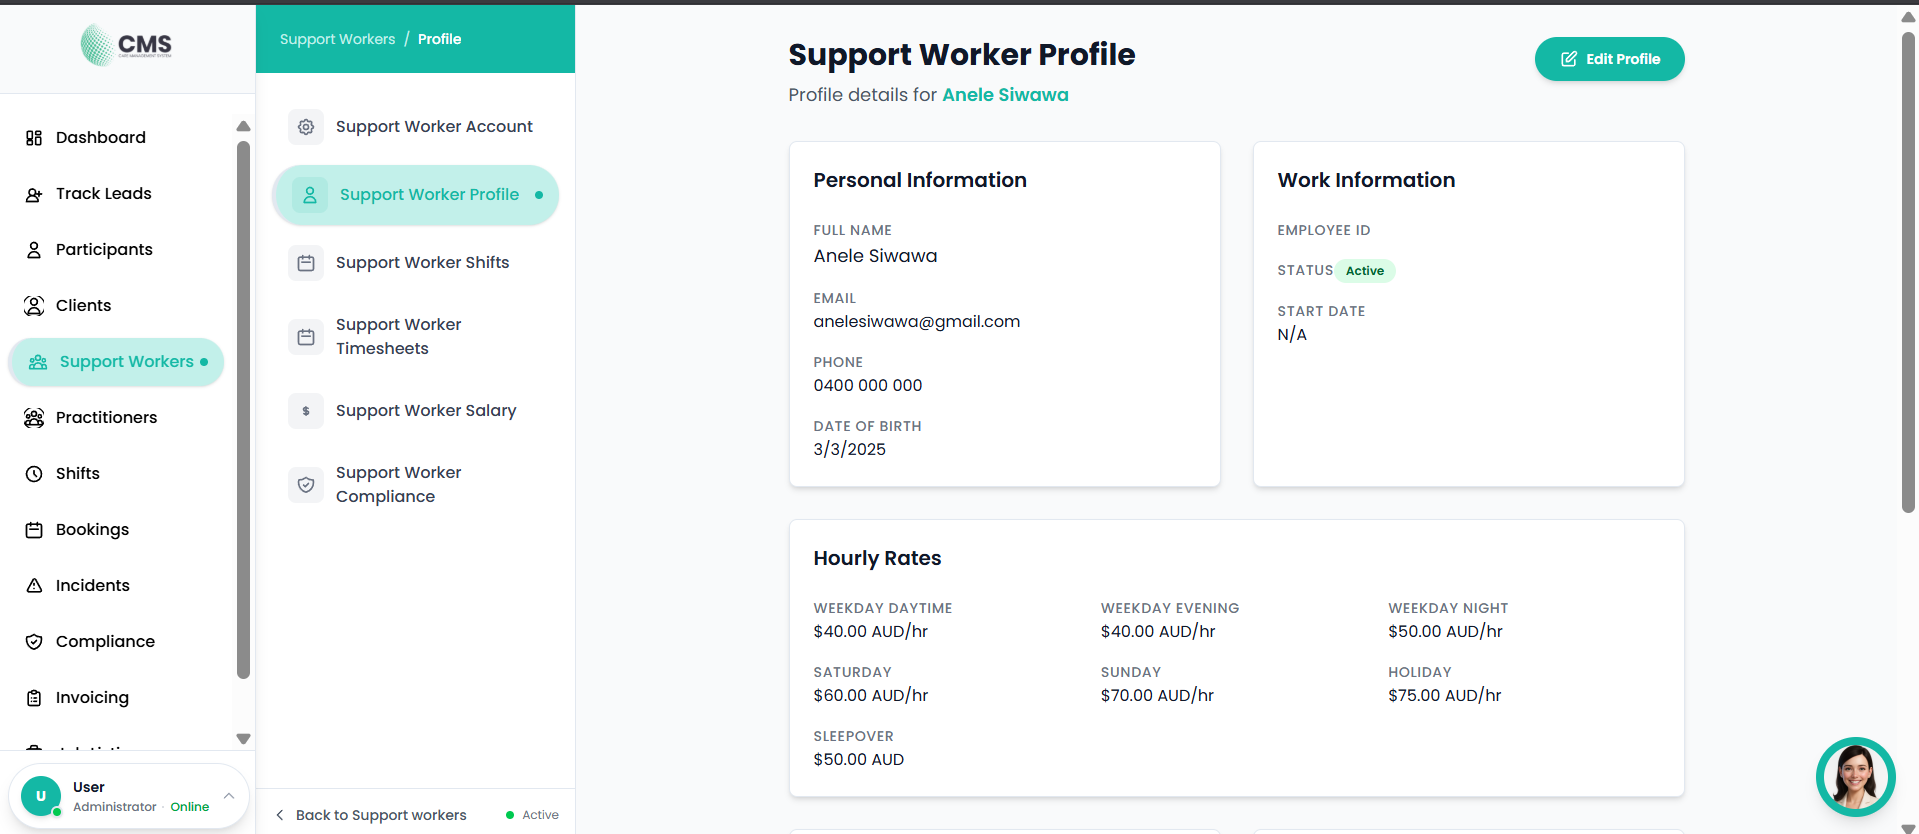
Figure 11.3 — Worker Profile (Admin View)
Worker Compliance (Admin)
Review and manage a worker's compliance documents and certifications.
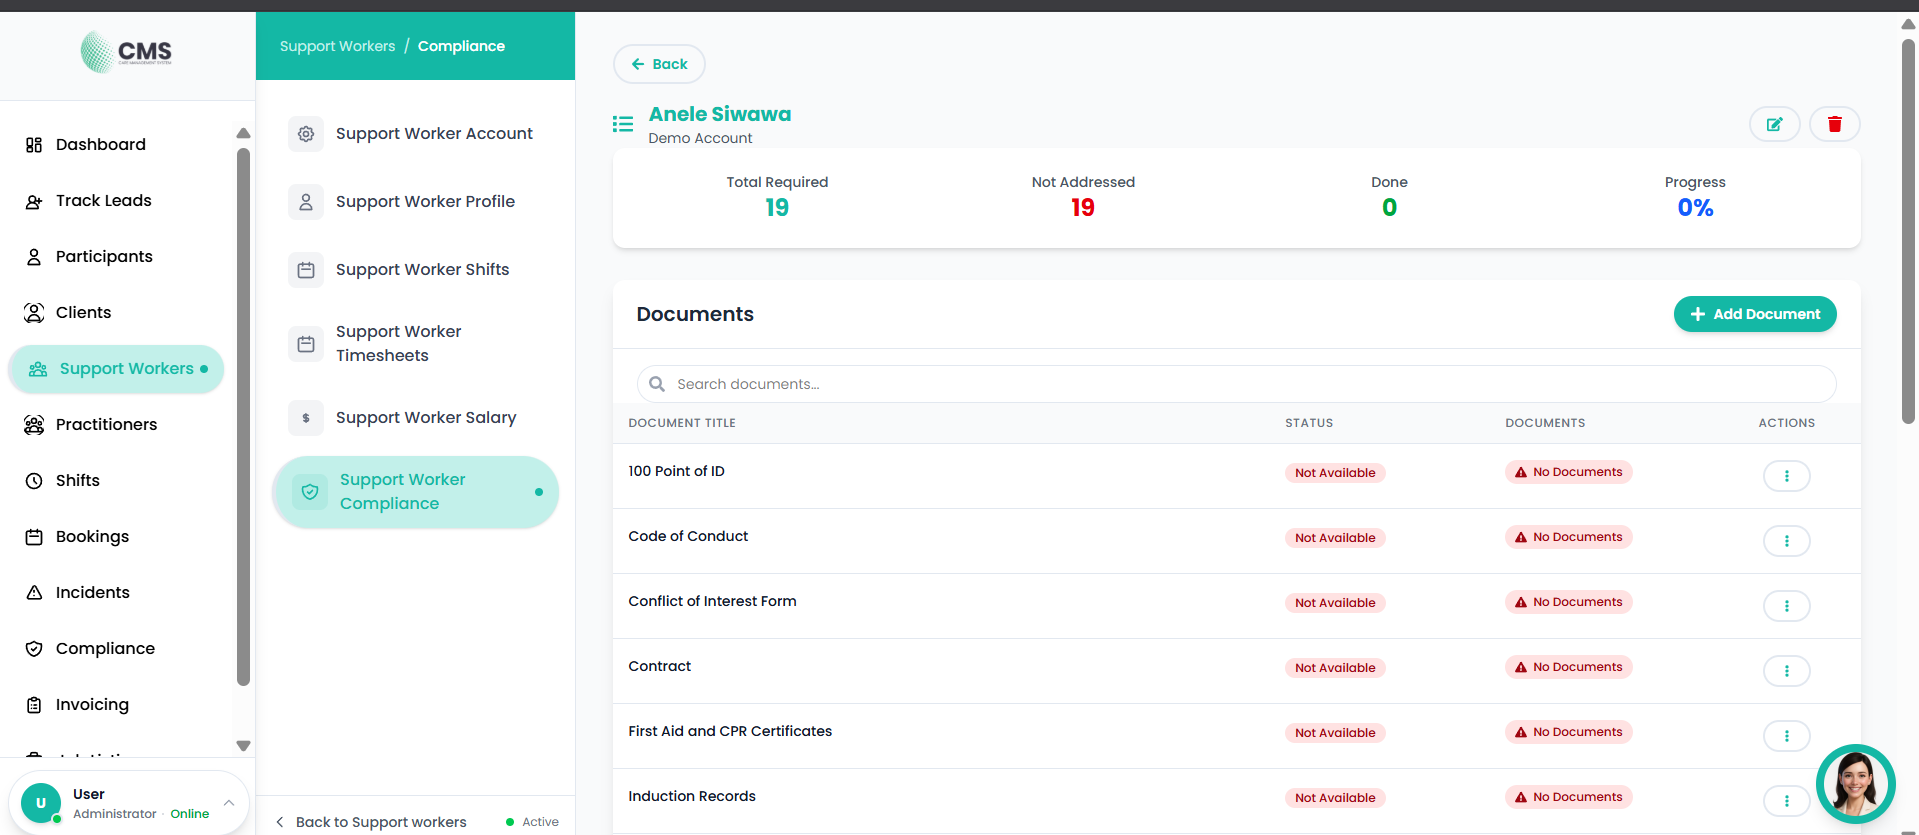
Figure 11.4 — Worker Compliance
Worker Shifts (Admin)
View and manage a worker's shift assignments and schedule.
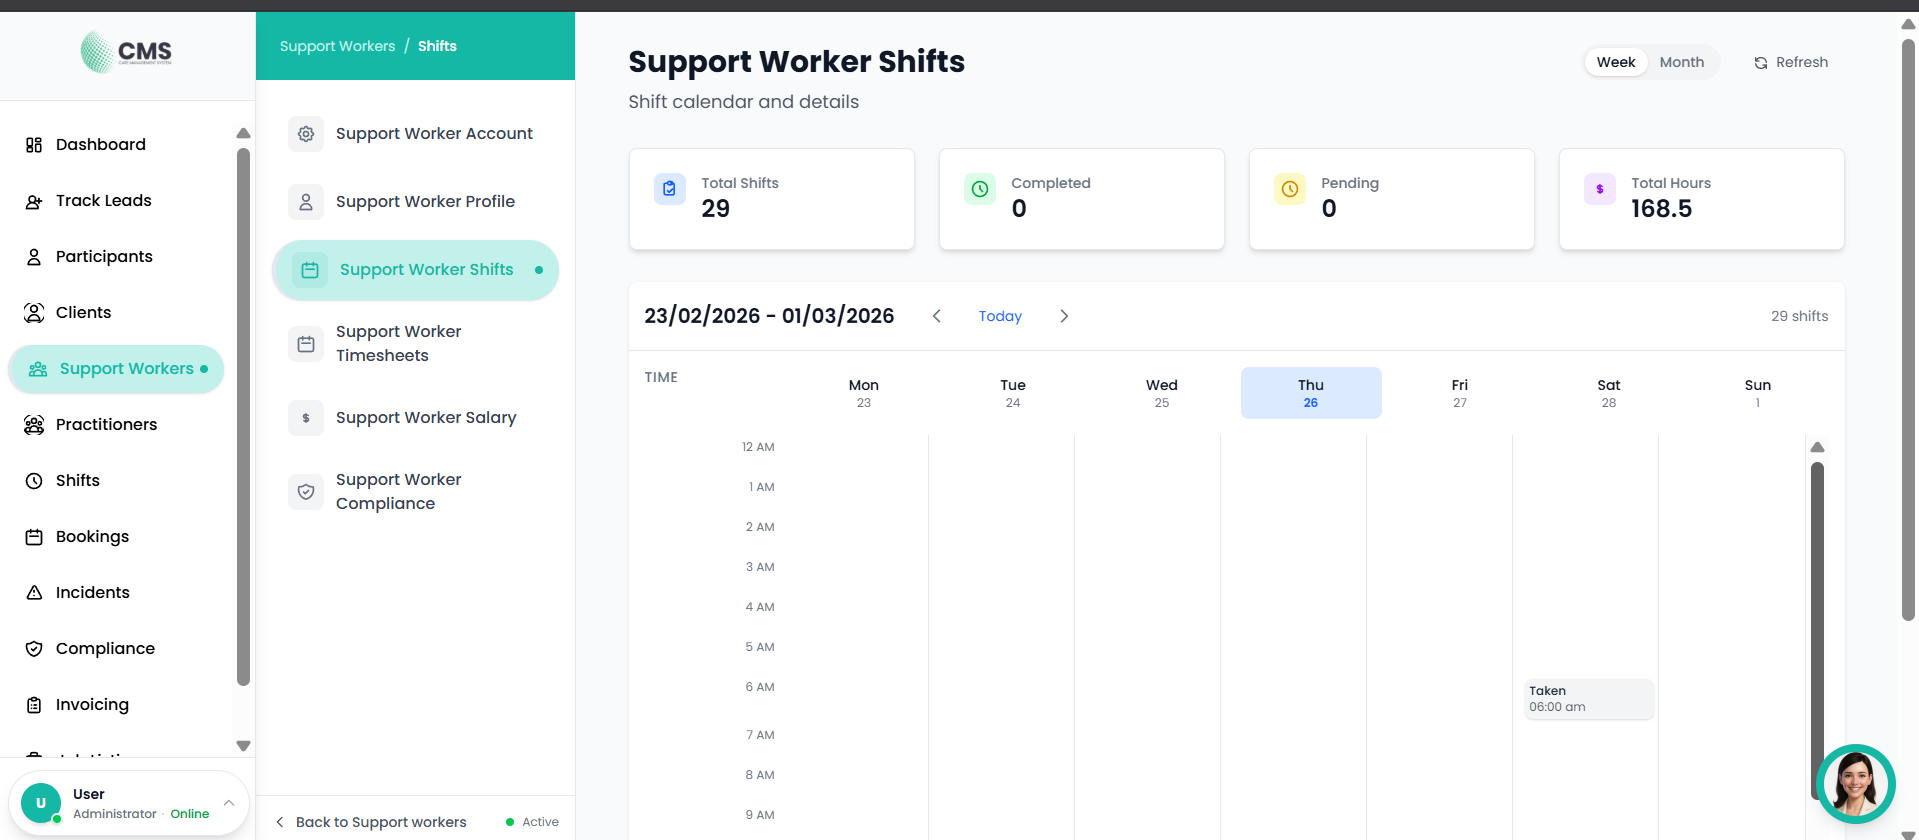
Figure 11.5 — Worker Shifts
Worker Timesheets (Admin)
Review, approve, and manage a worker's timesheet submissions.
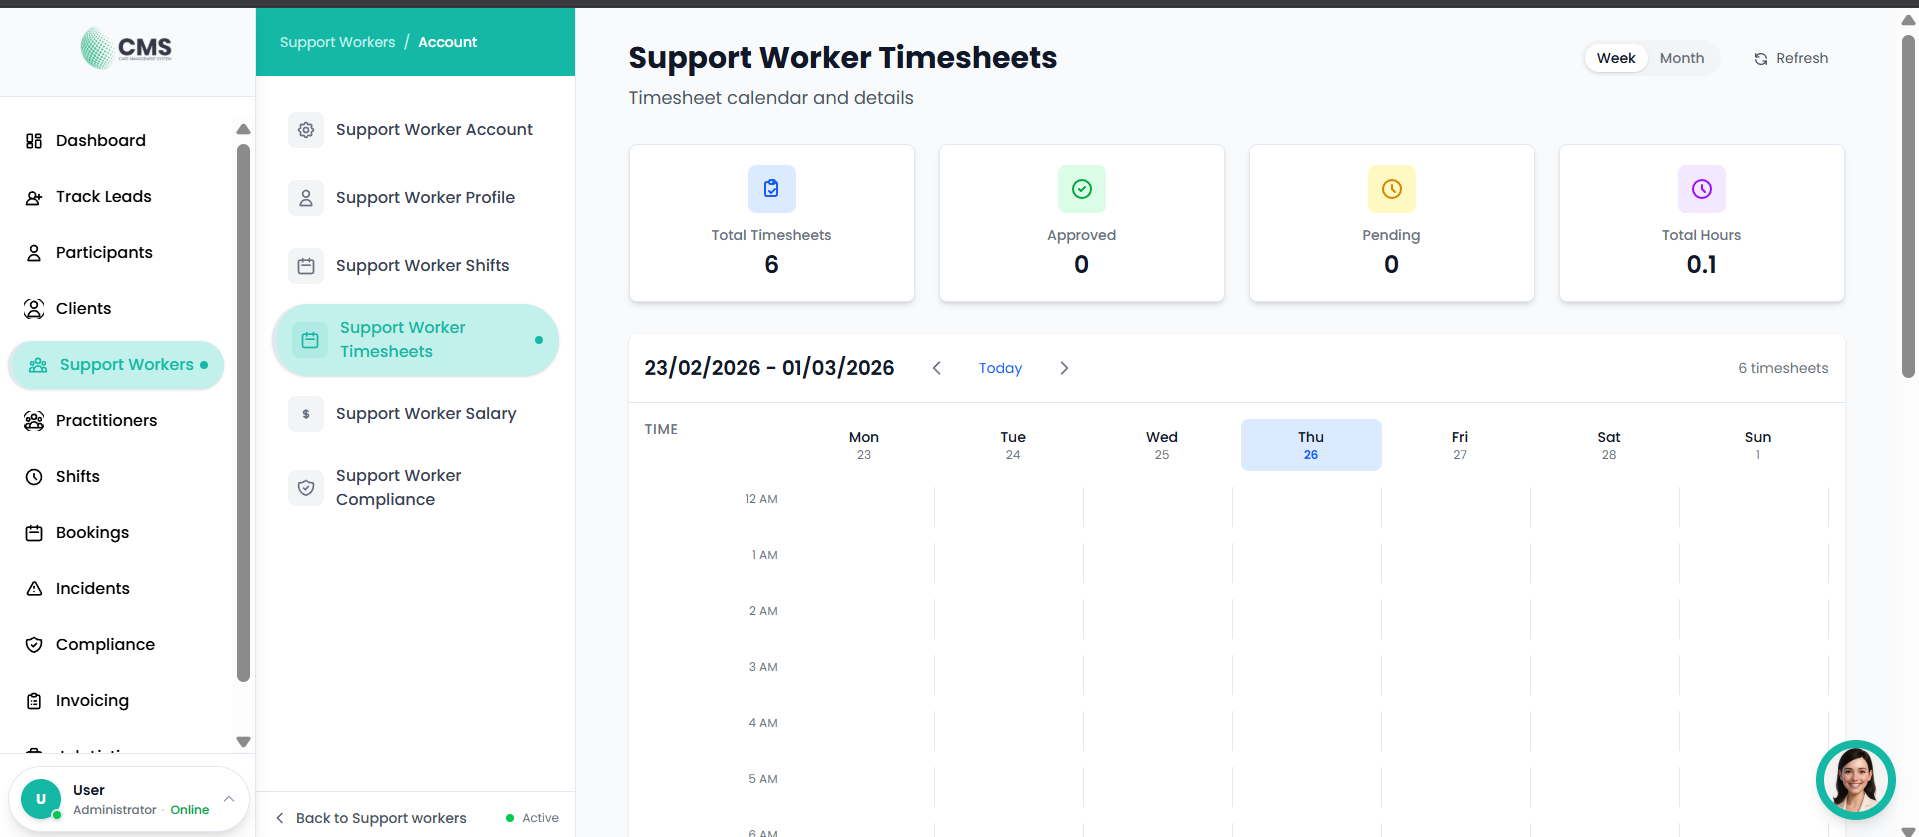
Figure 11.6 — Worker Timesheets
12. Track Leads
Manage prospective participants and clients before they are fully onboarded — capture enquiries, track follow-ups, and convert leads. The Track Leads screen has two tabs: My Leads (your provider's own leads) and Recommended Leads (platform-wide leads shared across all providers).
My Leads
- 1Click Track Leads in the sidebar.
- 2The My Leads tab is selected by default — view all your leads with status indicators and search filtering.
- 3Click Add Lead to create a new lead record.
- 4Update lead status: New → Contacted → Converted or Dropped.
- 5When ready, convert a lead to a Participant or Client record.
Track Leads — My Leads
View all your prospective participants with status indicators, source tracking, and search.
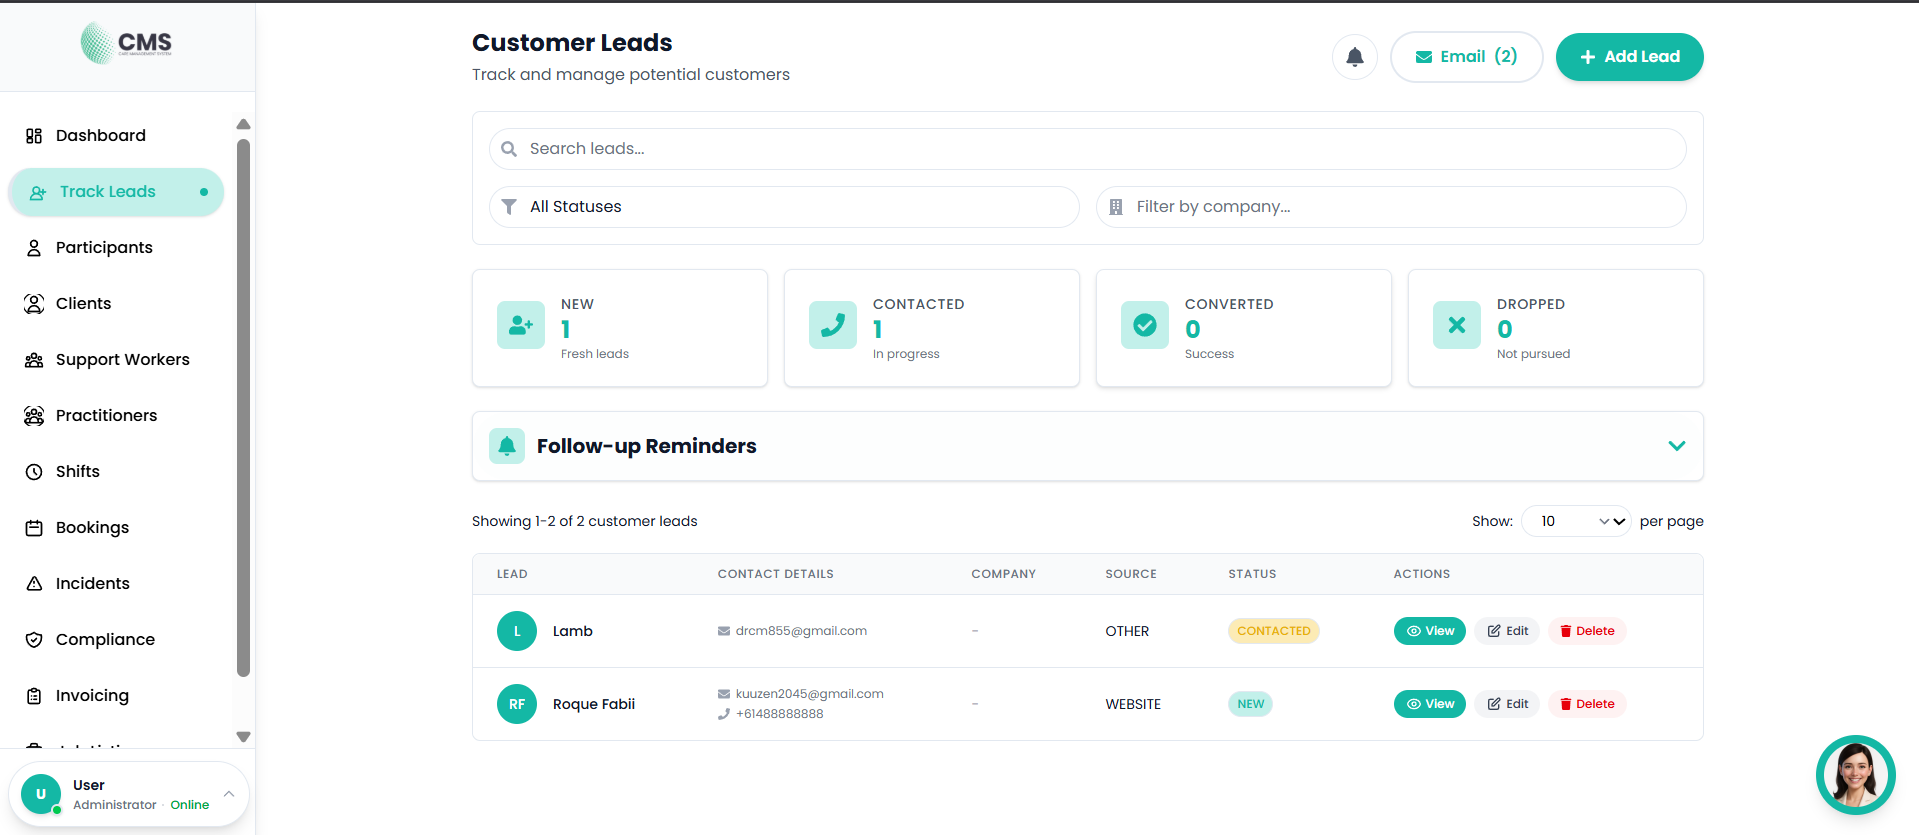
Figure 12.1 — Track Leads — My Leads Tab
Create Lead Form
Add a new prospective participant or client.
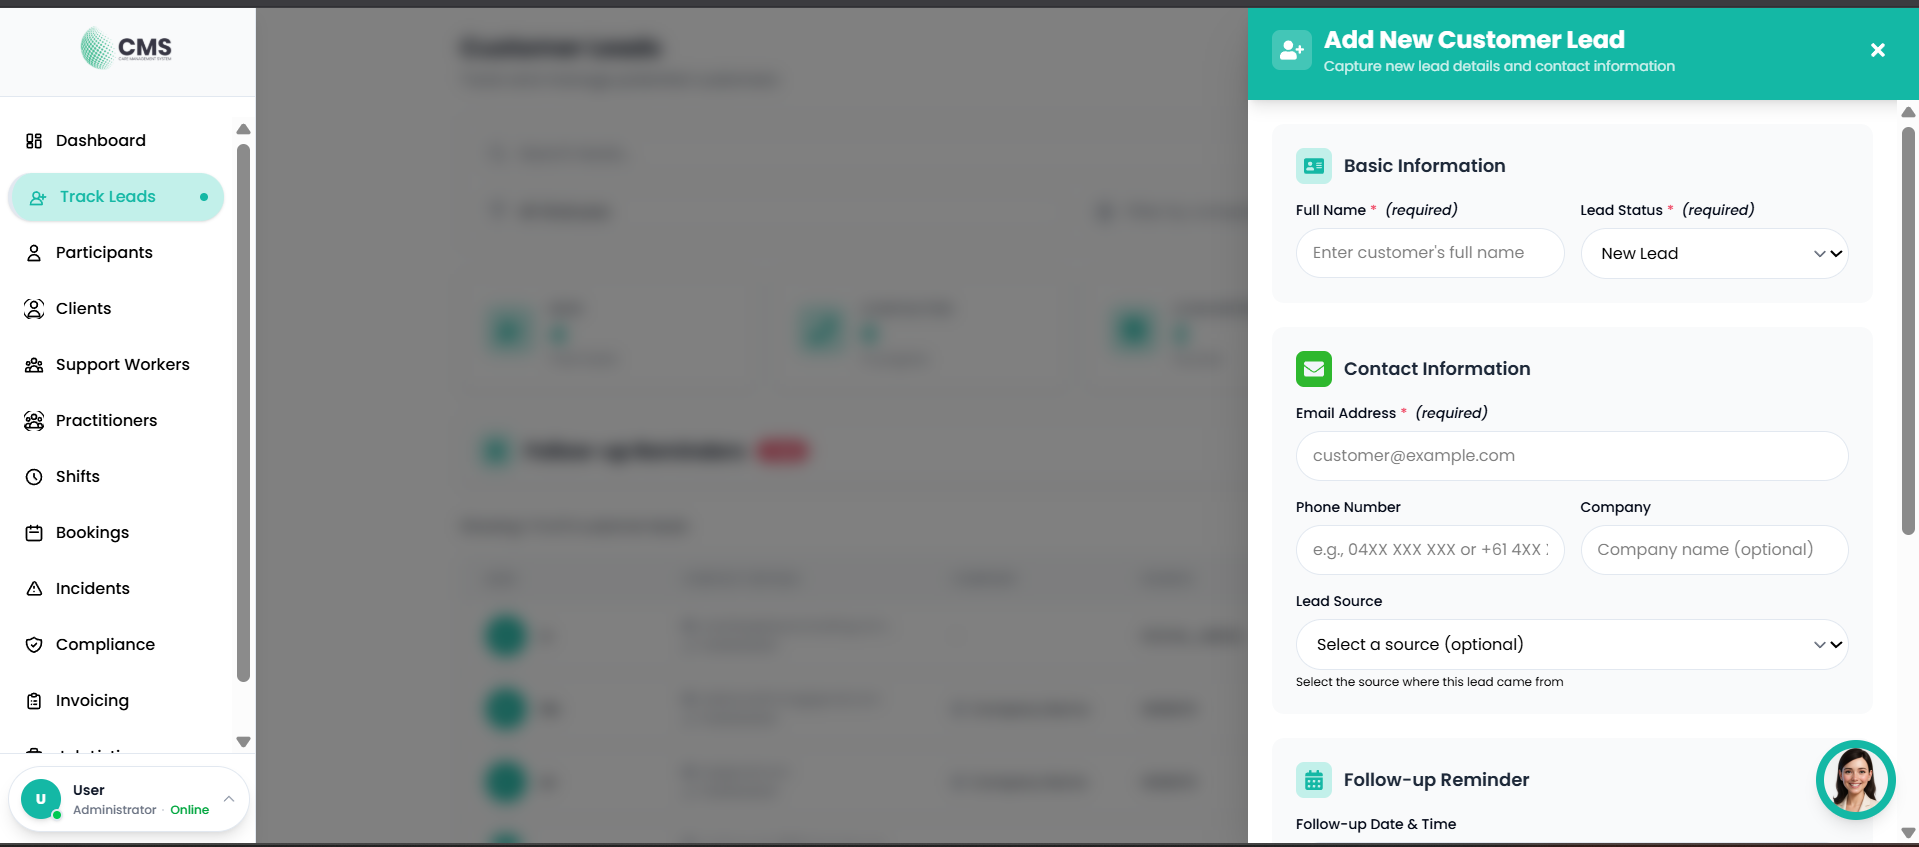
Figure 12.2 — Create Lead Form
Recommended Leads
The Recommended Leads tab shows leads from across the entire platform — not just your provider's own leads. These are shared leads that any provider can view and reach out to. This tab is read-only: you can view details but cannot edit, delete, or add leads here.
- 1Click the Recommended Leads tab at the top of the Track Leads screen.
- 2The tab loads platform-wide leads automatically on first open.
- 3Browse the table — each row shows the lead's name, notes, and an external link if one has been provided.
- 4Click the link icon in the Link column to open the lead's associated URL in a new tab.
- 5Click View in the Actions column to open the full lead details drawer, including all contact information and notes.
Recommended Leads — Table Columns
13. Property Directory
The Property Directory allows home owners and providers to list and manage SDA (Specialist Disability Accommodation) and SIL (Supported Independent Living) properties. Listings are visible to participants browsing the Find a Home section of the platform.
Accessing My Properties
- 1Click Properties (or My Properties) in the sidebar navigation.
- 2The Properties screen loads your current listings with summary statistics at the top.
- 3Use the Search bar, Status, Category, and Availability filters to narrow the list.
- 4Click Add Property to create a new listing.
- 5Click any property card to view or edit its full details.
Property Filters
Available Filter Options
Adding a Property
- 1Click Add Property on the Properties screen.
- 2The property form drawer opens. Fill in the property details:
- 3Basic info — property name, category (SDA/SIL), and description.
- 4Location — full address including street, suburb, state, and postcode.
- 5Availability — mark whether the property currently has vacancies.
- 6Status — set to Active to make the listing visible to participants on Find a Home.
- 7Click Save to publish the listing.
Editing or Removing a Property
- 1Click the property card you want to update.
- 2Click the Edit button (pencil icon) to open the edit form.
- 3Update any fields and click Save to apply changes.
- 4To remove a listing, click Delete and confirm the prompt. This action cannot be undone.
Property Statistics
The top of the Properties screen displays summary counts across your portfolio:
- Total Properties — all listings regardless of status
- Active — currently live and visible to participants
- Available — active listings with current vacancies
- Under Review / Pending — listings awaiting approval or completion